
koala73/worldmonitorConnectors
Real-time global intelligence dashboard. AI-powered news aggregation, geopolitical monitoring, and infrastructure tracking in a unified situational awareness interface
86k
This server exposes Zabbix API actions as MCP tools so AI clients can read problems, manage hosts, inspect templates, and run other Zabbix operations. It supports multiple Zabbix servers, token-based access control, OAuth 2.1, tool filtering, and PDF report generation.
Builders who want their AI client to work directly with Zabbix data and admin actions.
You can ask your agent to inspect and manage Zabbix instead of switching to the Zabbix UI.
Exposes Zabbix API groups as MCP tools for hosts, problems, triggers, templates, users, dashboards, and more.
Lets one server connect to multiple Zabbix instances and route requests to the right one.
Supports OAuth 2.1 plus named bearer tokens with scopes, IP limits, expiry, and server binding.
Generates PDF reports from Zabbix data with report templates and delivery support.
Includes a web admin UI for tokens, users, servers, settings, and a wizard that generates config snippets for MCP clients.
Ships install scripts, systemd service files, Docker support, and logrotate setup for production use.
git clone https://github.com/initMAX/zabbix-mcp-server.git
cd zabbix-mcp-server
sudo ./deploy/install.sh
sudo nano /etc/zabbix-mcp/config.toml   # fill in your Zabbix URL + API token
sudo systemctl start zabbix-mcp-server
sudo systemctl enable zabbix-mcp-server
git clone https://github.com/initMAX/zabbix-mcp-server.git
cd zabbix-mcp-server
sudo ./deploy/install.sh
./deploy/install-user.sh              # install
./deploy/install-user.sh update       # git pull + pip + restart
./deploy/install-user.sh uninstall
cd zabbix-mcp-server
sudo ./deploy/install.sh update
# Enable PDF reporting on an existing install that didn't have it
sudo ./deploy/install.sh update --with-reporting

# Update without PDF reporting dependencies (smaller install)
sudo ./deploy/install.sh update --without-reporting
git fetch origin && git reset --hard origin/main
sudo ./deploy/install.sh update
developed and maintained by
 and community







Overview: What is this? · Features
Install: Quick Start · Installation · Upgrade · First-time admin access
Configure: Reference · OAuth 2.1 · Public URL · TLS / HTTPS · Token Budget
Use: Client Wizard · AI Clients · Prompts · Tools · Parameters · PDF Reports
Operate: Installer CLI · Update notifications · Compatibility · Development · Related Projects · License
MCP (Model Context Protocol) is an open standard that lets AI assistants (ChatGPT, Claude, VS Code Copilot, JetBrains AI, Codex, and others) use external tools. This server exposes the entire Zabbix API as MCP tools — allowing any compatible AI assistant to query hosts, check problems, manage templates, acknowledge events, and perform any other Zabbix operation.
The server runs as a standalone HTTP service. AI clients connect to it over the network.
host_status_get, hostgroup_overview_get, infrastructure_summary_get, item_history_summary_get, problem_active_get (fold 3-5 raw API calls into one round-trip). Plus graph_render (PNG export), anomaly_detect (z-score analysis), capacity_forecast (linear regression), item_threshold_search (filter items by lastvalue thresholds), report_generate (PDF reports), action_prepare/action_confirm (two-step write approval), health_check (server diagnostics) and zabbix_raw_api_call (admin escape hatch for un-wrapped methods).generate-token), or config.tomlmonitoring, alerts, users, extensions, etc.) or individual API prefix to reduce the tool catalog size and stay under LLM context limits (see Token Budget below)extend for full detailszabbix_raw_api_call tool for any API method not explicitly definedgit clone https://github.com/initMAX/zabbix-mcp-server.git
cd zabbix-mcp-server
sudo ./deploy/install.sh
sudo nano /etc/zabbix-mcp/config.toml # fill in your Zabbix URL + API token
sudo systemctl start zabbix-mcp-server
sudo systemctl enable zabbix-mcp-server
Done. The server is running on http://127.0.0.1:8080/mcp.
Detailed guide: See
INSTALL.mdfor step-by-step instructions for both on-prem (systemd) and Docker deployments, including uninstall, security checklist, and TLS setup.
git clone https://github.com/initMAX/zabbix-mcp-server.git
cd zabbix-mcp-server
sudo ./deploy/install.sh
The install script will:
zabbix-mcp (no login shell)/opt/zabbix-mcp/venv/etc/zabbix-mcp/config.tomlzabbix-mcp-server)/var/log/zabbix-mcp/*.log (daily, 30 days retention)For developers running the server locally on their own machine, an alternative installer is shipped that does not require sudo:
./deploy/install-user.sh              # install
./deploy/install-user.sh update       # git pull + pip + restart
./deploy/install-user.sh uninstall
It detects Python 3.10+, creates a virtualenv inside the repo, copies config.example.toml to config.toml (with log_file rewritten to a user-writable path), and registers a background service:
~/Library/LaunchAgents/com.initmax.zabbix-mcp-server.plist (auto-restart via KeepAlive)--user unit at ~/.config/systemd/user/zabbix-mcp-server.service with loginctl enable-linger so the service survives logoutThis is intended for local development. For production servers use the regular sudo ./deploy/install.sh above.
cd zabbix-mcp-server
sudo ./deploy/install.sh update
That's the whole procedure — no manual steps afterwards. From v1.15+ the update command handles git sync, package reinstall, systemd reload, validation, and service restart in one shot.
What update does:
fetch + reset --hard origin/<branch> if history diverged), then re-executes itself from the updated script./opt/zabbix-mcp/venv.config.toml — aborts if the config is invalid.systemctl restart zabbix-mcp-server and performs an HTTP health check on the configured port.What is preserved (never overwritten):
/etc/zabbix-mcp/config.toml — your Zabbix URL, API token, MCP tokens, scopes, TLS settings, etc.[admin.users.*] inside config.toml).You'll see ✓ Config preserved at /etc/zabbix-mcp/config.toml (not overwritten) during the update. Check config.example.toml afterwards for any new options added in the release.
PDF reporting during update:
By default update keeps your current reporting state — if PDF reporting was installed, it stays; if it wasn't, it is not added. To change that:
# Enable PDF reporting on an existing install that didn't have it
sudo ./deploy/install.sh update --with-reporting

# Update without PDF reporting dependencies (smaller install)
sudo ./deploy/install.sh update --without-reporting
The --with-reporting flag pulls in weasyprint, jinja2, and system libs (cairo, pango, gdk-pixbuf). See PDF Reports for what you get.
Upgrading from very old versions (pre-v1.15)? If
updatefails, do a one-time manual sync first:git fetch origin && git reset --hard origin/main sudo ./deploy/install.sh updateTroubleshooting: if something goes wrong, inspect:
sudo ./deploy/install.sh test-config       # validate config.toml
sudo journalctl -u zabbix-mcp-server -n 50 --no-pager
Edit the config file with your Zabbix server details:
sudo nano /etc/zabbix-mcp/config.toml
Minimal configuration - just fill in your Zabbix URL and API token:
[server]
transport = "http"
host = "127.0.0.1"
port = 8080

[zabbix.production]
url = "https://zabbix.example.com"
api_token = "your-api-token"
read_only = true
verify_ssl = true
All available options with detailed descriptions are documented in config.example.toml.
The config file contains two different types of tokens that serve different purposes:
┌────────────┐  MCP token (Bearer)  ┌──────────────────┐   api_token     ┌───────────────┐
│ MCP Client ├──────────────────────► MCP Server       ├─────────────────► Zabbix Server │
│ (AI / IDE) │    (optional)        │ (zabbix-mcp)     │   (required)    │               │
└────────────┘                      │                  │                 └───────────────┘
                                    │ Admin Portal     │
                                    │ :9090 (optional) │
                                    └──────────────────┘
api_token (in [zabbix.*]) — required — authenticates the MCP server to your Zabbix instance. This is a Zabbix API token that you create in the Zabbix frontend.
How to create one:
The token inherits the permissions of the Zabbix user it belongs to:
| Use case | Recommended Zabbix role | read_only config |
|---|---|---|
| Read-only monitoring (problems, hosts, dashboards) | User role with read access to needed host groups | true |
| Full management (create hosts, templates, triggers) | Admin role with read-write access to target host groups | false |
| Complete API access (users, settings, global scripts) | Super admin role | false |
Use the principle of least privilege — create a dedicated Zabbix user for the MCP server with only the permissions it needs.
Protects the MCP server from unauthorized access. When configured, MCP clients must include a bearer token in every request: Authorization: Bearer <token>.
Recommended: Multi-token system (v1.16+) — generate tokens via installer, admin portal, or manually:
# Generate a token via installer
sudo ./deploy/install.sh generate-token claude

# Or generate manually
python3 -c "import secrets,hashlib; t='zmcp_'+secrets.token_hex(32); print(f'Token: {t}\nHash:  sha256:{hashlib.sha256(t.encode()).hexdigest()}')"
Then add to config.toml:
[tokens.claude]
name = "Claude Code"
token_hash = "sha256:<paste hash>"
scopes = ["*"]           # or specific: ["monitoring", "alerts"]
read_only = true
Each token can have independent scopes, IP restrictions, server binding, and expiry. See config.example.toml for all options.
Legacy: Single auth_token — still supported for backward compatibility:
[server]
auth_token = "your-secret-token-here"
Legacy
auth_tokenis automatically migrated to[tokens.legacy]on first v1.16 start.
When no tokens are configured, the server accepts unauthenticated connections. This is safe when bound to 127.0.0.1 (default) but must be configured when exposed to the network (0.0.0.0).
OAuth 2.1 (v1.28+) — for clients that auto-discover authentication (ChatGPT custom apps, Claude Desktop remote, MCP Inspector). Enable with:
[server]
public_url = "https://mcp.example.com"  # required when OAuth is on

[oauth]
enabled = true
Login uses the existing admin-portal users. Dynamic client registration (RFC 7591) is on by default; ChatGPT's "Advanced OAuth settings" auto-detects everything from the .well-known/... discovery documents. The legacy [tokens.X] bearer mode keeps working alongside OAuth - existing CLI scripts and workflow tools need no change.
Full setup, security checklist, and troubleshooting in docs/OAUTH.md.
You can connect to multiple Zabbix instances. Each tool has a server parameter to select which one to use (defaults to the first defined):
[zabbix.production]
url = "https://zabbix.example.com"
api_token = "prod-token"
read_only = true

[zabbix.staging]
url = "https://zabbix-staging.example.com"
api_token = "staging-token"
read_only = false
The first server (production) is used as the default. To target a specific instance, just mention it naturally in your prompt:
| Prompt | Target server | What happens |
|---|---|---|
| "Show me hosts with high CPU usage" | production (default) | Queries the first defined server automatically |
| "Show me hosts in our staging Zabbix instance" | staging | AI recognizes "staging" and routes to the matching server |
| "What are the top triggers in the last hour on production?" | production | Explicit mention of "production" confirms the default |
| "Compare trigger counts between production and staging" | both | AI queries both servers and combines the results |
| "Create a maintenance window on staging for tonight" | staging | Write operation routed to staging (requires read_only = false) |
| "Acknowledge all disaster problems on production" | production | Write operation on production (blocked if read_only = true) |
| "Export the 'Linux by Zabbix agent' template from production" | production | Read-only export, works even with read_only = true |
| "Import this template to staging" | staging | Write operation routed to staging |
| "Migrate host 'web-01' from production to staging" | both | AI reads from production, creates on staging |
The AI assistant maps your natural language to the correct server parameter automatically — no need to use technical syntax like server = "staging" in your prompts.
The MCP server itself is stateless — there is no shared state between instances. You can run multiple MCP server instances behind a reverse proxy (nginx, HAProxy, Caddy) using round-robin load balancing. Each instance connects to Zabbix independently.
Note: When your Zabbix runs in HA mode with multiple frontends, the API is available on each frontend. Currently the MCP server connects to a single
urlper[zabbix.<name>]entry. Multi-frontend failover (connecting to multiple URLs for the same Zabbix instance) is a planned feature.
sudo systemctl start zabbix-mcp-server
sudo systemctl enable zabbix-mcp-server
Verify the server is running:
sudo systemctl status zabbix-mcp-server
The server exposes two health check mechanisms:
| Method | Endpoint | Auth required | Returns |
|---|---|---|---|
| HTTP endpoint | GET /health | No | {"status": "ok"} — confirms the HTTP server is running |
| MCP tool | health_check | Yes (if auth_token set) | Full connectivity status of each configured Zabbix server |
Quick check from the command line:
# Simple HTTP health check (no authentication needed)
curl http://localhost:8080/health
# → {"status":"ok"}
Use the HTTP /health endpoint for load balancer probes, uptime monitoring, and container orchestration readiness checks. Use the health_check MCP tool for deeper diagnostics including Zabbix server connectivity.
The application writes to the log file configured in config.toml (log_file). Startup errors before logging initialization go to the systemd journal.
# Live log stream (application log)
tail -f /var/log/zabbix-mcp/server.log

# Via journalctl (startup errors + fallback)
sudo journalctl -u zabbix-mcp-server -f
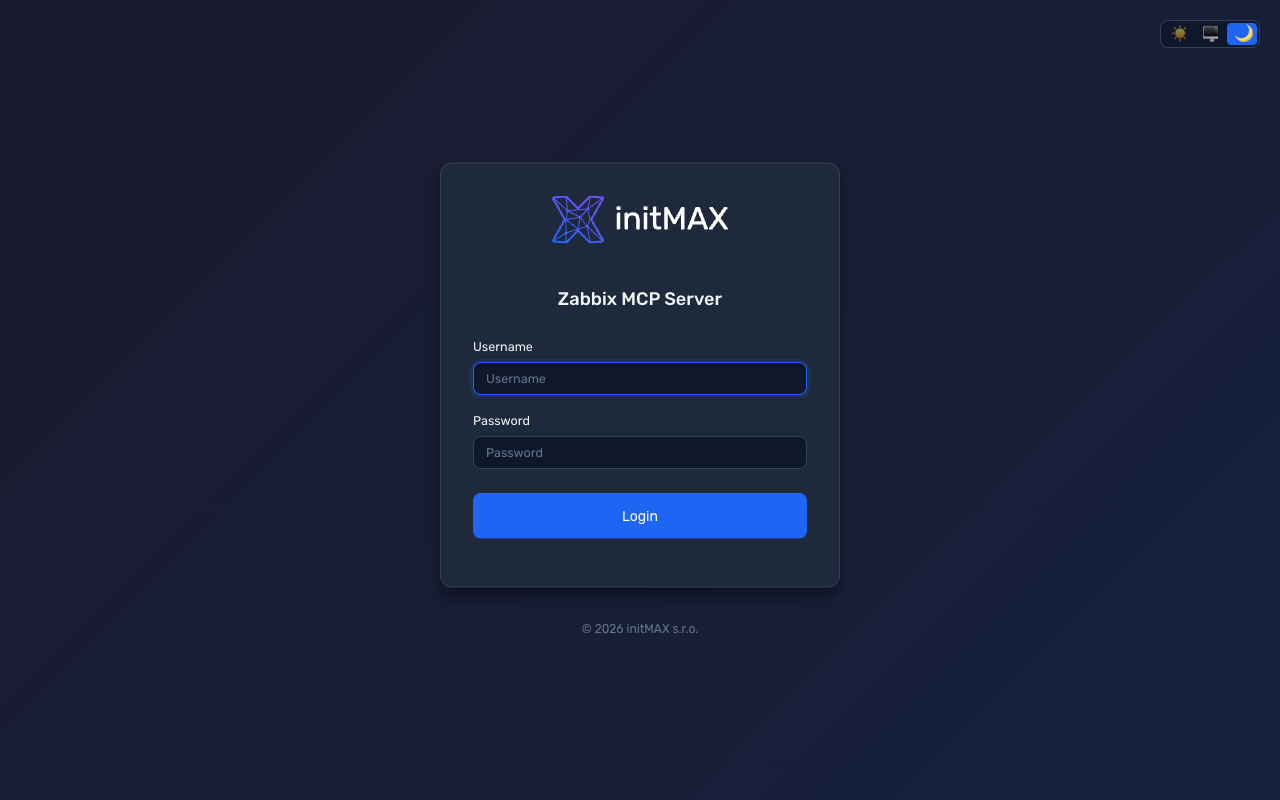
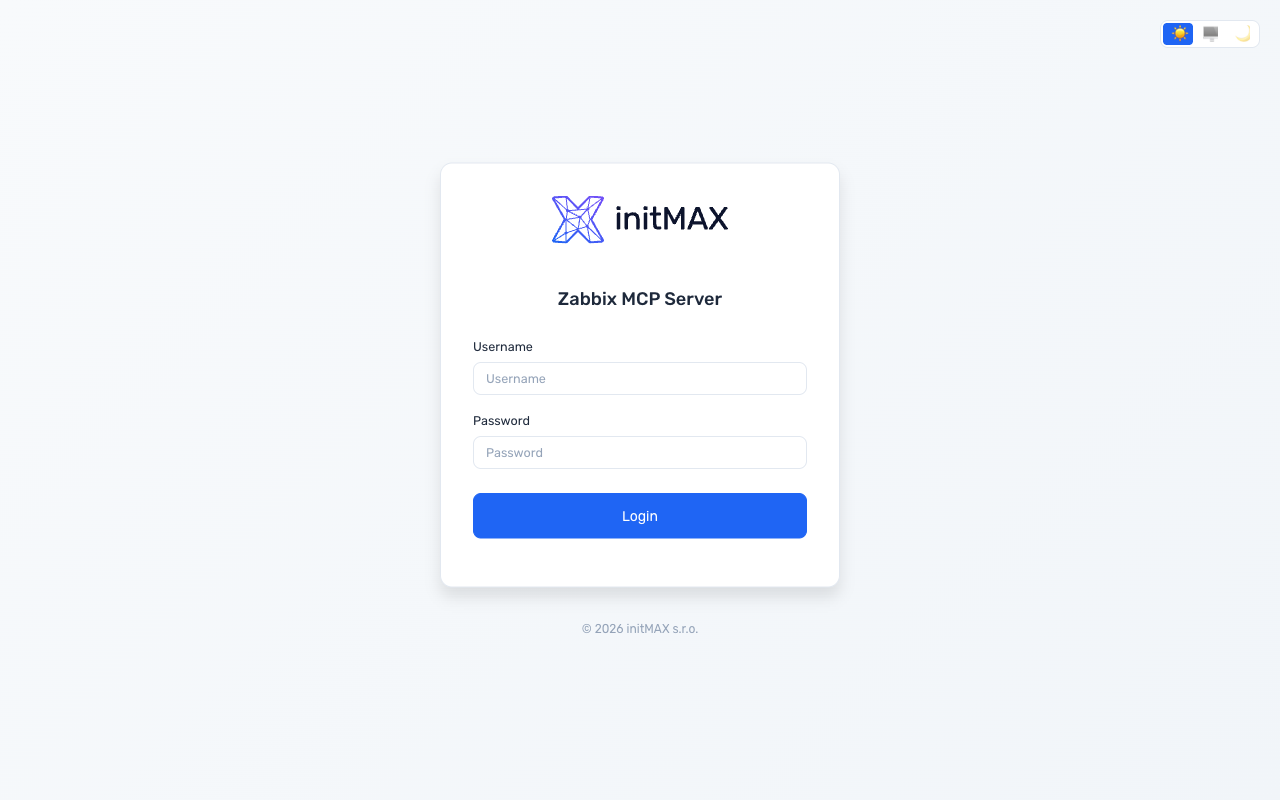
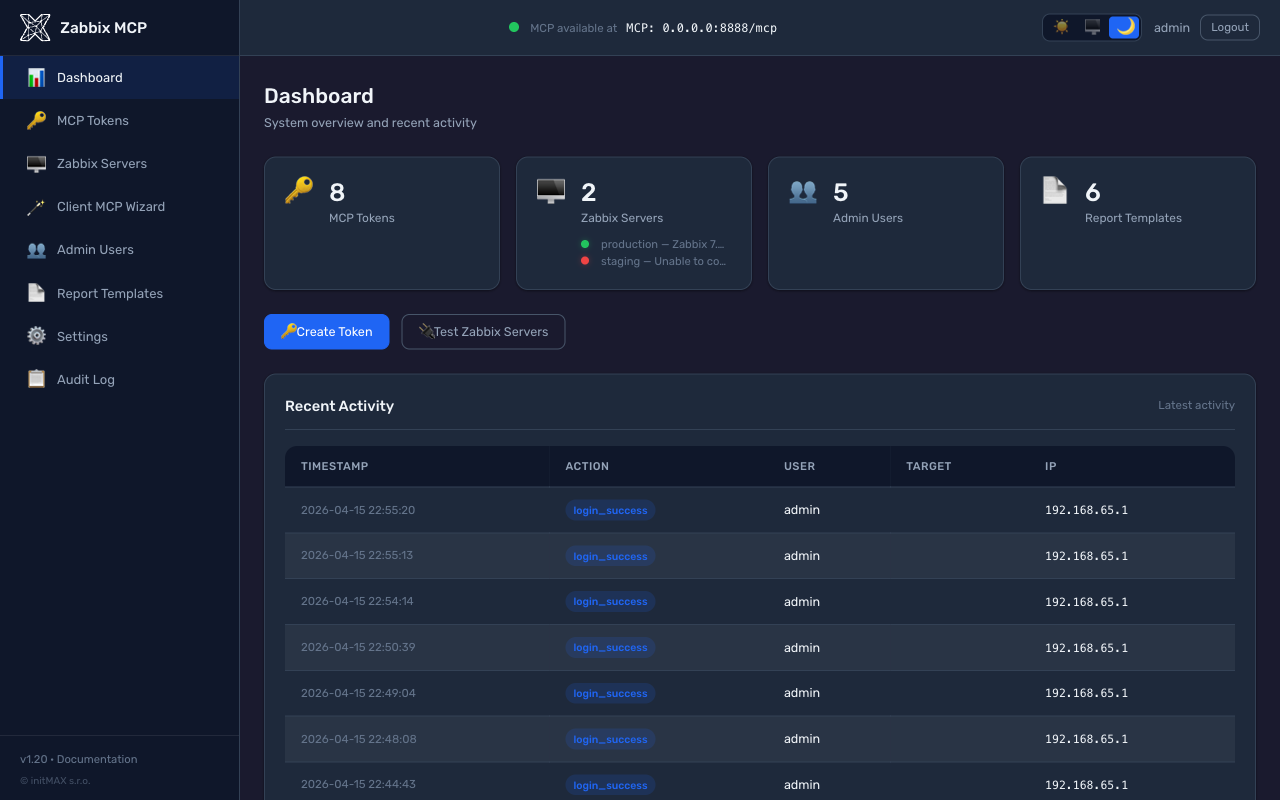
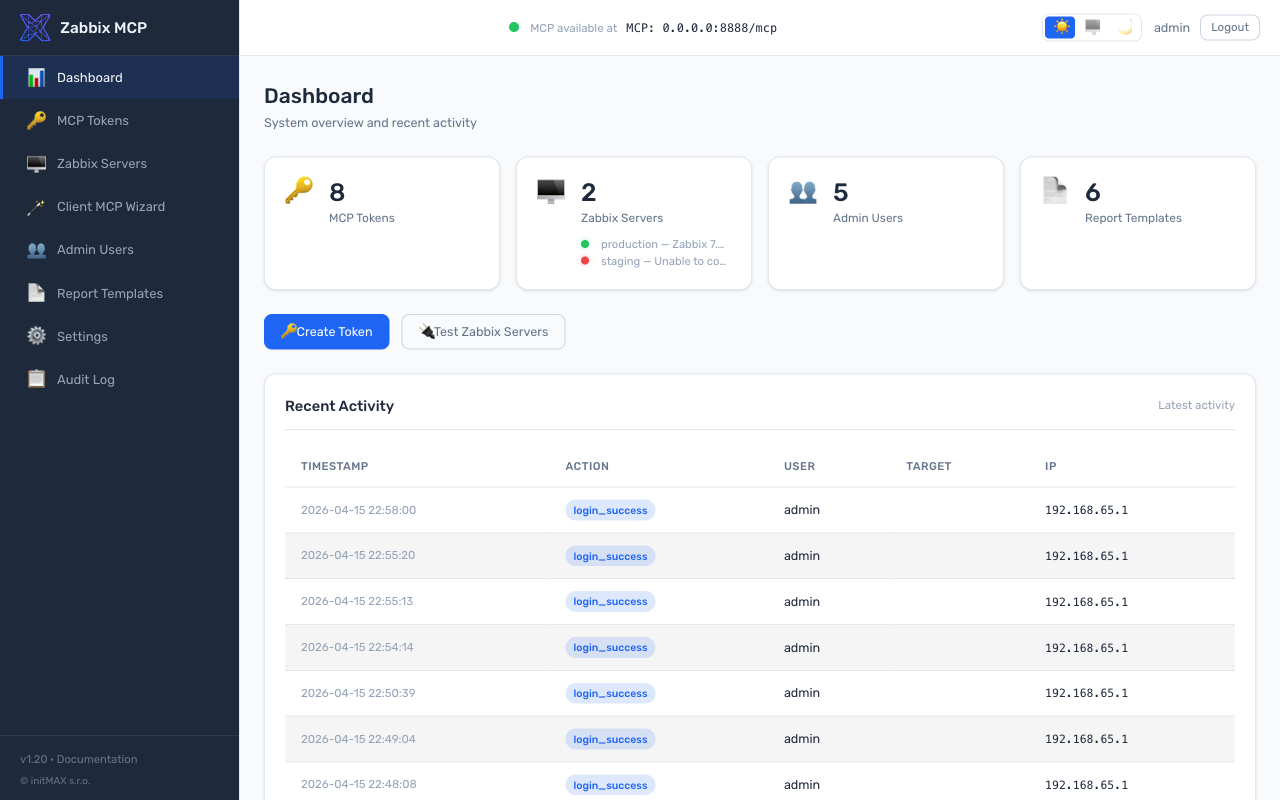
Web-based administration portal for managing MCP tokens, users, report templates, and server settings. Runs on a separate port (default: 9090) — the MCP port (8080) serves only the MCP protocol, no admin UI.
 |  |
 |  |
[admin]
enabled = true
port = 9090
The installer generates an admin password automatically. To reset: sudo ./deploy/install.sh set-admin-password
Features:
| Feature | Description |
|---|---|
| Dashboard | System overview with MCP health status (green/red dot), Zabbix server connectivity with async token validation, uptime, recent audit activity |
| MCP Tokens | Create, revoke, per-token scope control (group + individual tool level), per-token Zabbix server binding, IP restrictions, expiry, read-only flag; legacy token migration with tooltip |
| Tool Exposure | Drag & drop bubble UI for enabling/disabling tools globally and per-token; groups + individual tool prefixes; globally disabled tools shown as locked in token scopes |
| Zabbix Servers | Connection status with API + token validation (detects "API online but token invalid"), version display, test connection, add/edit/delete |
| Client MCP Wizard (beta) | Point-and-click generator: pick a Zabbix server -> pick a token (or skip auth) -> pick one of 14 AI clients -> get a copy-paste-ready config snippet + per-client install instructions. Handles URL composition, 0.0.0.0 host override, transport picker, token substitution in the snippet and curl test. Feedback wanted - please report issues at https://github.com/initMAX/zabbix-mcp-server/issues. |
| Users | Admin / operator / viewer roles; password complexity enforcement (10+ chars, uppercase, digit) |
| Report Templates | Built-in + custom templates, GrapesJS visual editor with Zabbix blocks, HTML code editor, variable picker, server-side Jinja2 preview |
| Settings | All config.toml sections editable — MCP Server, TLS & Security, Tool Exposure (allowlist + denylist), PDF Reports & Branding, Admin Portal |
| Audit Log | All admin actions logged (JSON lines), filterable by date/action/user, CSV export |
| Restart Management | Blikající "Restart needed" badge in header after config changes; click to restart with progress bar polling until MCP is back online |
| Design | initMAX branded, dark/light/auto mode, Rubik font, instant CSS tooltips, responsive mobile layout |
All changes are written back to config.toml (preserving comments and formatting via tomlkit). Every config change triggers a "Restart needed" indicator.
Beta - introduced in v1.20 with 14 supported clients and wide test coverage, but we are still collecting real-world feedback on the per-client snippets, the OAuth-vs-Bearer handling (especially Claude Desktop + ChatGPT), and edge cases around Docker / NAT / reverse-proxy host overrides. Please report issues at https://github.com/initMAX/zabbix-mcp-server/issues so we can graduate it out of beta.
A standalone page at /wizard (sidebar entry Client MCP Wizard) that replaces hand-editing JSON / TOML config files for 14 AI clients. Single-page progressive disclosure in four steps:
[zabbix.*] entries from config.toml.allowed_servers includes the chosen server, plus per-token scope chips (groups + individual prefixes), IP restrictions, and expiry. When the MCP server is in no-auth mode, a Continue without token card generates a tokenless snippet; when auth is enabled, the + Create new token card chains into /tokens/create?return_to=/wizard and comes back with the new token pre-filled via a URL fragment (never sent to the server).[server].host = 0.0.0.0 (Docker container IPs are de-emphasized with a manual-entry input on top), transport picker with a "detected" badge on the running transport, per-client install instructions on the left, syntax-highlighted snippet on the right with a copy-on-hover overlay icon, download-as-file button, and a matching curl quick-test block. Both code blocks subSign in to join the discussion.
No comments yet. Be the first to say what this is good for.
Real-time global intelligence dashboard. AI-powered news aggregation, geopolitical monitoring, and infrastructure tracking in a unified situational awareness interface
High-performance code intelligence MCP server. Indexes codebases into a persistent knowledge graph — average repo in milliseconds. 158 languages, sub-ms queries, 99% fewer tokens. Single static binary, zero dependencies.
Universal provider proxy for OpenAI Codex & Claude Code — use any LLM (Claude, Gemini, Grok, DeepSeek, Ollama…) with Codex CLI, App, SDK, and Claude Code

Git-native persistent memory for AI coding agents. Implements Google OKF v0.2 with sub-300µs in-memory BM25 search, embedded MCP server, and progressive disclosure. Slashes token bloat by 80% with zero external databases or dependencies. Built in pure Go.

Local-first code intelligence graph for MCP and CLI. Builds a persistent map of your codebase so AI coding tools read only what matters, with benchmarked context reductions on reviews and large-repo workflows.

Stop your AI from making things up — it proposes, deterministic tools decide, every claim checked against ground truth with evidence. Grounded facts and context survive resets. Reverse engineering is the proving ground. MCP server + CLI.