
koala73/worldmonitorConnectors
Real-time global intelligence dashboard. AI-powered news aggregation, geopolitical monitoring, and infrastructure tracking in a unified situational awareness interface
86k
This repo exposes AWS spend data through MCP so a Claude Desktop session or another MCP client can ask for cost and usage answers in natural language. The server reads from AWS Cost Explorer and CloudWatch Bedrock model invocation logs, and it can run locally over stdio or remotely over SSE.
Builders who want their agent to query AWS cost and Bedrock usage data.
You can ask an agent for AWS spend breakdowns instead of digging through console reports.
Provides tools like `get_ec2_spend_last_day()` and `get_detailed_breakdown_by_day(days=7)` for AWS cost analysis.
Pulls model invocation data from CloudWatch logs to show daily and hourly Bedrock usage by region and user.
Runs over `stdio` for local Claude Desktop use or `sse` for a remote server on EC2.
Includes setup paths for Claude Desktop plus client scripts for testing and a Chainlit app backed by LangGraph.
Can assume a role in another AWS account to return spend information from that account.
# On macOS and Linux
curl -LsSf https://astral.sh/uv/install.sh | sh
# On Windows
powershell -ExecutionPolicy ByPass -c "irm https://astral.sh/uv/install.ps1 | iex"
git clone https://github.com/aarora79/aws-cost-explorer-mcp.git
cd aws-cost-explorer-mcp
uv venv --python 3.12 && source .venv/bin/activate && uv pip install --requirement pyproject.toml
mkdir -p ~/.aws
# Set up your credentials in ~/.aws/credentials and ~/.aws/config
export MCP_TRANSPORT=stdio
export BEDROCK_LOG_GROUP_NAME=YOUR_BEDROCK_CW_LOG_GROUP_NAME
export CROSS_ACCOUNT_ROLE_NAME=ROLE_NAME_FOR_THE_ROLE_TO_ASSUME_IN_OTHER_ACCOUNTS # can be ignored if you do not want AWS spend info from other accounts
python server.py
An MCP server for getting AWS spend data via Cost Explorer and Amazon Bedrock usage data via Model invocation logs in Amazon Cloud Watch through Anthropic's MCP (Model Control Protocol). See section on "secure" remote MCP server to see how you can run your MCP server over HTTPS.
flowchart LR
    User([User]) --> UserApp[User Application]
    UserApp --> |Queries| Host[Host]

    subgraph "Claude Desktop"
        Host --> MCPClient[MCP Client]
    end

    MCPClient --> |MCP Protocol over HTTPS| MCPServer[AWS Cost Explorer MCP Server]

    subgraph "AWS Services"
        MCPServer --> |API Calls| CostExplorer[(AWS Cost Explorer)]
        MCPServer --> |API Calls| CloudWatchLogs[(AWS CloudWatch Logs)]
    end
You can run the MCP server locally and access it via the Claude Desktop or you could also run a Remote MCP server on Amazon EC2 and access it via a MCP client built into a LangGraph Agent.
🚨You can also use this MCP server to get AWS spend information from other accounts as long as the IAM role used by the MCP server can assume roles in those other accounts🚨
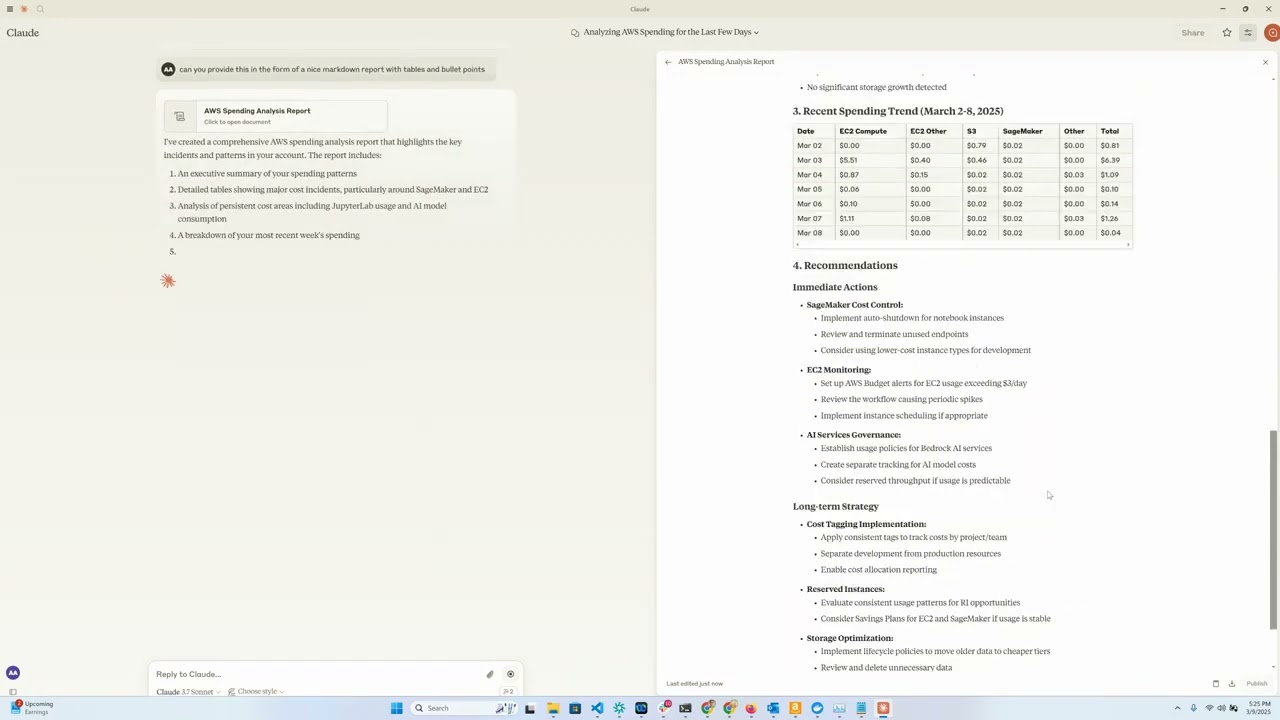
This tool provides a convenient way to analyze and visualize AWS cloud spending data using Anthropic's Claude model as an interactive interface. It functions as an MCP server that exposes AWS Cost Explorer API functionality to Claude Desktop, allowing you to ask questions about your AWS spend in natural language.
Install uv:
# On macOS and Linux
curl -LsSf https://astral.sh/uv/install.sh | sh
# On Windows
powershell -ExecutionPolicy ByPass -c "irm https://astral.sh/uv/install.ps1 | iex"
Additional installation options are documented here
Clone this repository: (assuming this will be updated to point to aws-samples?)
git clone https://github.com/aarora79/aws-cost-explorer-mcp.git
cd aws-cost-explorer-mcp
Set up the Python virtual environment and install dependencies:
uv venv --python 3.12 && source .venv/bin/activate && uv pip install --requirement pyproject.toml
Configure your AWS credentials:
mkdir -p ~/.aws
# Set up your credentials in ~/.aws/credentials and ~/.aws/config
If you useAWS IAM Identity Center, follow the docs to configure your short-term credentials
CROSS_ACCOUNT_ROLE_NAME parameter while starting the server and now you can provide the account AWS account id for another account while interacting with your agent and then agent will pass the account id to the server.Uses stdio as a transport for MCP, both the MCP server and client are running on your local machine.
Run the server using:
export MCP_TRANSPORT=stdio
export BEDROCK_LOG_GROUP_NAME=YOUR_BEDROCK_CW_LOG_GROUP_NAME
export CROSS_ACCOUNT_ROLE_NAME=ROLE_NAME_FOR_THE_ROLE_TO_ASSUME_IN_OTHER_ACCOUNTS # can be ignored if you do not want AWS spend info from other accounts
python server.py
There are two ways to configure this tool with Claude Desktop:
Add the following to your Claude Desktop configuration file. The file can be found out these paths depending upon you operating system.
{
  "mcpServers": {
    "aws-cost-explorer": {
      "command": "docker",
      "args": [ "run", "-i", "--rm", "-e", "AWS_ACCESS_KEY_ID", "-e", "AWS_SECRET_ACCESS_KEY", "-e", "AWS_REGION", "-e", "BEDROCK_LOG_GROUP_NAME", "-e", "MCP_TRANSPORT", "-e", "CROSS_ACCOUNT_ROLE_NAME", "aws-cost-explorer-mcp:latest" ],
      "env": {
        "AWS_ACCESS_KEY_ID": "YOUR_ACCESS_KEY_ID",
        "AWS_SECRET_ACCESS_KEY": "YOUR_SECRET_ACCESS_KEY",
        "AWS_REGION": "us-east-1",
        "BEDROCK_LOG_GROUP_NAME": "YOUR_CLOUDWATCH_BEDROCK_MODEL_INVOCATION_LOG_GROUP_NAME",
        "CROSS_ACCOUNT_ROLE_NAME": "ROLE_NAME_FOR_THE_ROLE_TO_ASSUME_IN_OTHER_ACCOUNTS",
        "MCP_TRANSPORT": "stdio"
      }
    }
  }
}
IMPORTANT: Replace
YOUR_ACCESS_KEY_IDandYOUR_SECRET_ACCESS_KEYwith your actual AWS credentials. Never commit actual credentials to version control.
If you prefer to run the server directly without Docker, you can use UV:
{
  "mcpServers": {
    "aws_cost_explorer": {
      "command": "uv",
      "args": [
          "--directory",
          "/path/to/aws-cost-explorer-mcp-server",
          "run",
          "server.py"
      ],
      "env": {
        "AWS_ACCESS_KEY_ID": "YOUR_ACCESS_KEY_ID",
        "AWS_SECRET_ACCESS_KEY": "YOUR_SECRET_ACCESS_KEY",
        "AWS_REGION": "us-east-1",
        "BEDROCK_LOG_GROUP_NAME": "YOUR_CLOUDWATCH_BEDROCK_MODEL_INVOCATION_LOG_GROUP_NAME",
        "CROSS_ACCOUNT_ROLE_NAME": "ROLE_NAME_FOR_THE_ROLE_TO_ASSUME_IN_OTHER_ACCOUNTS",
        "MCP_TRANSPORT": "stdio"
      }
    }
  }
}
Make sure to replace the directory path with the actual path to your repository on your system.
Uses sse as a transport for MCP, the MCP servers on EC2 and the client is running on your local machine. Note that Claude Desktop does not support remote MCP servers at this time (see this GitHub issue).
You can start a remote MCP server on Amazon EC2 by following the same instructions as above. Make sure to set the MCP_TRANSPORT as sse (server side events) as shown below. Note that the MCP uses JSON-RPC 2.0 as its wire format, therefore the protocol itself does not include authorization and authentication (see this GitHub issue), do not send or receive sensitive data over MCP.
Run the server using:
export MCP_TRANSPORT=sse
export BEDROCK_LOG_GROUP_NAME=YOUR_BEDROCK_CW_LOG_GROUP_NAME
export CROSS_ACCOUNT_ROLE_NAME=ROLE_NAME_FOR_THE_ROLE_TO_ASSUME_IN_OTHER_ACCOUNTS # can be ignored if you do not want AWS spend info from other accounts
python server.py
Also see section on running a "secure" remote MCP server i.e. a server to which your MCP clients can connect over HTTPS.
You can test your remote MCP server with the mcp_sse_client.py script. Running this script will print the list of tools available from the MCP server and an output for the get_bedrock_daily_usage_stats tool.
# set the hostname for your MCP server
MCP_SERVER_HOSTNAME=YOUR_MCP_SERVER_EC2_HOSTNAME
# or localhost if your MCP server is running locally
# MCP_SERVER_HOSTNAME=localhost
AWS_ACCOUNT_ID=AWS_ACCOUNT_ID_TO_GET_INFO_ABOUT # if set to empty or if the --aws-account-id switch is not specified then it gets the info about the AWS account MCP server is running in
python mcp_sse_client.py --host $MCP_SERVER_HOSTNAME --aws-account-id $AWS_ACCOUNT_ID
The app.py file in this repo provides a Chainlit app (chatbot) which creates a LangGraph agent that uses the LangChain MCP Adapter to import the tools provided by the MCP server as tools in a LangGraph Agent. The Agent is then able to use an LLM to respond to user questions and use the tools available to it as needed. Thus if the user asks a question such as "What was my Bedrock usage like in the last one week?" then the Agent will use the tools available to it via the remote MCP server to answer that question. We use Claude 3.5 Haiku model available via Amazon Bedrock to power this agent.
Run the Chainlit app using:
chainlit run app.py --port 8080
A browser window should open up on localhost:8080 and you should be able to use the chatbot to get details about your AWS spend.
The server exposes the following tools that Claude can use:
get_ec2_spend_last_day(): Retrieves EC2 spending data for the previous dayget_detailed_breakdown_by_day(days=7): Delivers a comprehensive analysis of costs by region, service, and instance typeget_bedrock_daily_usage_stats(days=7, region='us-east-1', log_group_name='BedrockModelInvocationLogGroup'): Delivers a per-day breakdown of model usage by region and users.get_bedrock_hourly_usage_stats(days=7, region='us-east-1', log_group_name='BedrockModelInvocationLogGroup'): Delivers a per-day per-hour breakdown of model usage by region and users.Once connected to Claude through an MCP-enabled interface, you can ask questions like:
A Dockerfile is included for containerized deployment:
docker build -t aws-cost-explorer-mcp .
docker run -v ~/.aws:/root/.aws aws-cost-explorer-mcp
server.py: Main server implementation with MCP toolspyproject.toml: Project dependencies and metadataDockerfile: Container definition for deploymentsTo extend the functionality:
server.py@mcp.tool()We can use nginx as a reverse-proxy so that it can provide an HTTPS endpoint for connecting to the MCP server. Remote MCP clients can connect to nginx over HTTPS and then it can proxy traffic internally to http://localhost:8000. The following steps describe how to do this.
Enable access to TCP port 443 from the IP address of your MCP client (your laptop, or anywhere) in the inbound rules in the security group associated with your EC2 instance.
You would need to have an HTTPS certificate and private key to proceed. Let's say you use your-mcp-server-domain-name.com as the domain for your MCP server then you will need an SSL cert for your-mcp-server-domain-name.com and it will be accessible to MCP clients as https://your-mcp-server-domain-name.com/sse. While you can use a self-signed cert but it would require disabling SSL verification on the MCP client, we DO NOT recommend you do that. If you are hosting your MCP server on EC2 then you could generate an SSL cert using no-ip or Let' Encrypt or other similar services. Place the SSL cert and private key files in /etc/ssl/certs and /etc/ssl/privatekey folders respectively on your EC2 machine.
Install nginx on your EC2 machine using the following commands.
sudo apt-get install nginx
sudo nginx -t
sudo systemctl reload nginx
Get the hostname for your EC2 instance, this would be needed for configuring the nginx reverse proxy.
TOKEN=$(curl -X PUT "http://169.254.169.254/latest/api/token" -H "X-aws-ec2-metadata-token-ttl-seconds: 21600") && curl -H "X-aws-ec2-metadata-token: $TOKEN" -s http://169.254.169.254/latest/meta-data/public-hostname
Copy the following content into a new file /etc/nginx/conf.d/ec2.conf. Replace YOUR_EC2_HOSTNAME, /etc/ssl/certs/cert.pem and /etc/ssl/privatekey/privkey.pem with values appropriate for your setup.
server {
 listen 80;
 server_name YOUR_EC2_HOSTNAME;

 # Optional: Redirect HTTP to HTTPS
 return 301 https://$host$request_uri;
 }

 server {
     listen 443 ssl;
     server_name YOUR_EC2_HOSTNAME;

     # Self-signed certificate paths
     ssl_certificate     /etc/ssl/certs/cert.pem;
     ssl_certificate_key /etc/ssl/privatekey/privkey.pem;

     # Optional: Good practice
     ssl_protocols       TLSv1.2 TLSv1.3;
     ssl_ciphers         HIGH:!aNULL:!MD5;

     location / {
         # Reverse proxy to your local app (e.g., port 8000)
         proxy_pass http://127.0.0.1:8000;
         proxy_http_version 1.1;
         proxy_set_header Host $host;
         proxy_set_header X-Real-IP $remote_addr;
         proxy_set_header X-Forwarded-For $proxy_add_x_forwarded_for;
     }
 }
Restart nginx.
sudo systemctl start nginx
Start your MCP server as usual as described in the remote setup section.
Your MCP server is now accessible over HTTPS as https://your-mcp-server-domain-name.com/sse to your MCP client.
On the client side now (say on your laptop or in your Agent) configure your MCP client to communicate to your MCP server as follows.
MCP_SERVER_HOSTNAME=YOUR_MCP_SERVER_DOMAIN_NAME
AWS_ACCOUNT_ID=AWS_ACCOUNT_ID_TO_GET_INFO_ABOUT # if set to empty or if the --aws-account-id switch is not specified then it gets the info about the AWS account MCP server is running in
python mcp_sse_client.py --host $MCP_SERVER_HOSTNAME --port 443 --aws-account-id $AWS_ACCOUNT_ID
Similarly you could run the chainlit app to talk to remote MCP server over HTTPS.
export MCP_SERVER_URL=YOUR_MCP_SERVER_DOMAIN_NAME
export MCP_SERVER_PORT=443
chainlit run app.py --port 8080
Similarly you could run the LangGraph Agent to talk to remote MCP server over HTTPS.
python langgraph_agent_mcp_sse_client.py --host $MCP_SERVER_HOSTNAME --port 443 --aws-account-id $AWS_ACCOUNT_ID
Sign in to join the discussion.
No comments yet. Be the first to say what this is good for.
Real-time global intelligence dashboard. AI-powered news aggregation, geopolitical monitoring, and infrastructure tracking in a unified situational awareness interface
High-performance code intelligence MCP server. Indexes codebases into a persistent knowledge graph — average repo in milliseconds. 158 languages, sub-ms queries, 99% fewer tokens. Single static binary, zero dependencies.
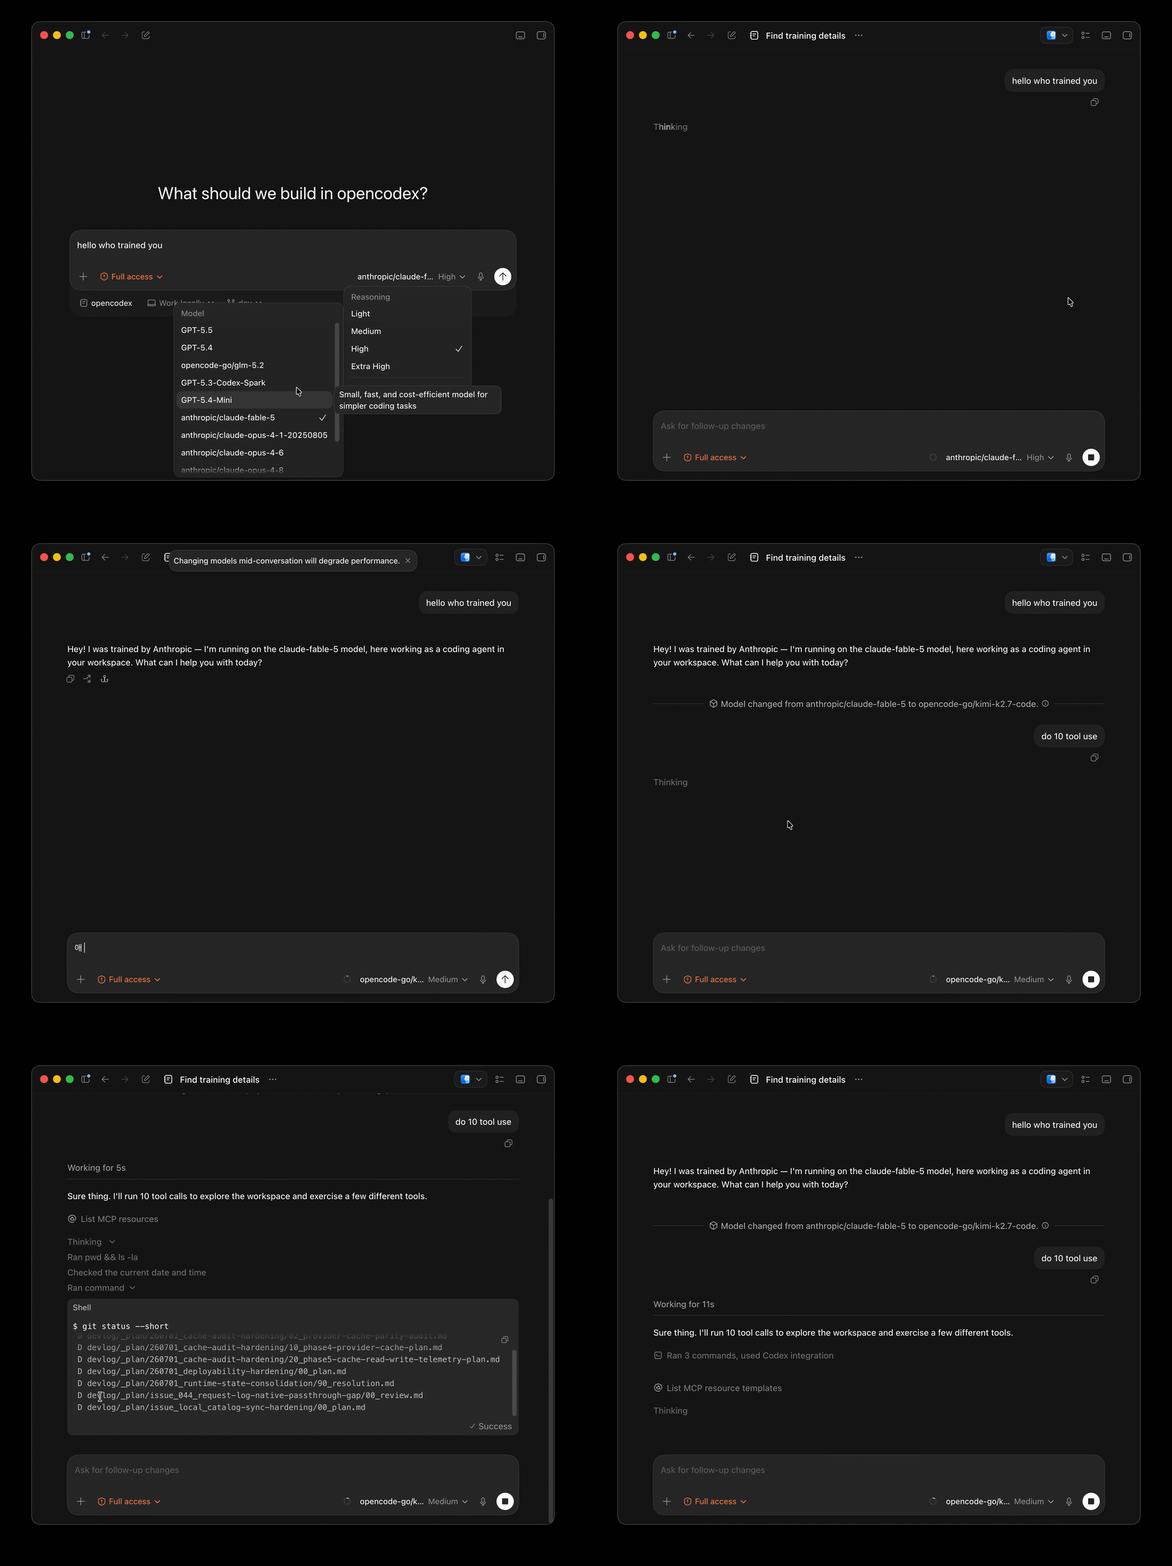
Universal provider proxy for OpenAI Codex & Claude Code — use any LLM (Claude, Gemini, Grok, DeepSeek, Ollama…) with Codex CLI, App, SDK, and Claude Code

Git-native persistent memory for AI coding agents. Implements Google OKF v0.2 with sub-300µs in-memory BM25 search, embedded MCP server, and progressive disclosure. Slashes token bloat by 80% with zero external databases or dependencies. Built in pure Go.

Stop your AI from making things up — it proposes, deterministic tools decide, every claim checked against ground truth with evidence. Grounded facts and context survive resets. Reverse engineering is the proving ground. MCP server + CLI.
20 MB lightweight cross-platform database client for 90+ databases, including MySQL, PostgreSQL, SQLite, Redis, MongoDB, DuckDB, SQL Server, and Dameng. Built-in AI, MCP Server, CLI, desktop and Docker. | 轻量级跨平台数据库管理工具,支持 MySQL、PostgreSQL、SQLite、Redis、MongoDB、达梦等 90+ 数据库,提供桌面端、Docker、CLI、内置 AI 助手和 MCP Server。