

affaan-m/
ECC

affaan-m/ECCHarnesses
The agent harness performance optimization system. Skills, instincts, memory, security, and research-first development for Claude Code, Codex, Opencode, Cursor and beyond.
258k
multi-agent-shogun is a workflow harness that launches a Shogun commander, a Karo manager, and multiple Ashigaru workers in separate tmux panes. It moves tasks through YAML files and generated instructions so agents can work in parallel with visible state and minimal coordination overhead.
Builders who want Claude Code and other coding CLIs to run as a coordinated team in tmux.
You can hand off one task and watch several agents work on it in parallel without re-explaining the setup each time.
Defines Shogun, Karo, Ashigaru, and Gunshi roles so work is assigned and reviewed in layers.
Starts multiple CLI sessions at once and keeps them visible in separate panes.
Works with Claude Code, Codex, Copilot, Cursor, OpenCode, Kimi, and Antigravity.
Builds CLI-specific files such as `CLAUDE.md`, `AGENTS.md`, and Copilot instructions from shared templates.
Lets workers propose reusable patterns as new skills during real work.
Uses YAML queue files and a dashboard view to track tasks, reports, and progress.
git clone https://github.com/yohey-w/multi-agent-shogun
cd multi-agent-shogun
bash first_setup.sh                        # one-time setup: config, dependencies, MCP
source ~/.bashrc                           # reload PATH
claude --dangerously-skip-permissions      # first run only: OAuth + accept Bypass Permissions → /exit
bash shutsujin_departure.sh                # launch all agents
cd /mnt/c/tools/multi-agent-shogun
./first_setup.sh
./shutsujin_departure.sh
# 1. Apply PATH changes
source ~/.bashrc

# 2. OAuth login + Bypass Permissions approval (one command)
claude --dangerously-skip-permissions
#    → Browser opens → Log in with Anthropic account → Return to CLI
#    → "Bypass Permissions" prompt appears → Select "Yes, I accept" (↓ to option 2, Enter)
#    → Type /exit to quit
cd /mnt/c/tools/multi-agent-shogun
./shutsujin_departure.sh
# Server-side (WSL2)
curl -fsSL https://tailscale.com/install.sh | sh
sudo tailscaled &
sudo tailscale up --authkey tskey-auth-XXXXXXXXXXXX
sudo service ssh start
Command your AI army like a feudal warlord.
Run 10 AI coding agents in parallel — Claude Code, OpenAI Codex, GitHub Copilot, Kimi Code, OpenCode, Cursor, Antigravity — orchestrated through a samurai-inspired hierarchy with zero coordination overhead.
Talk Coding, not Vibe Coding. Speak to your phone, AI executes.


📖 Sequel (Aug 2026): The author has since disbanded his own 10-agent army down to a single agent that carries his judgment. The successor project is kagemusha — it ships the forms of a judgment loop (corrections → principles → standing rules), not the agents. The story of the disbandment: article (JP). multi-agent-shogun itself continues to work as-is.
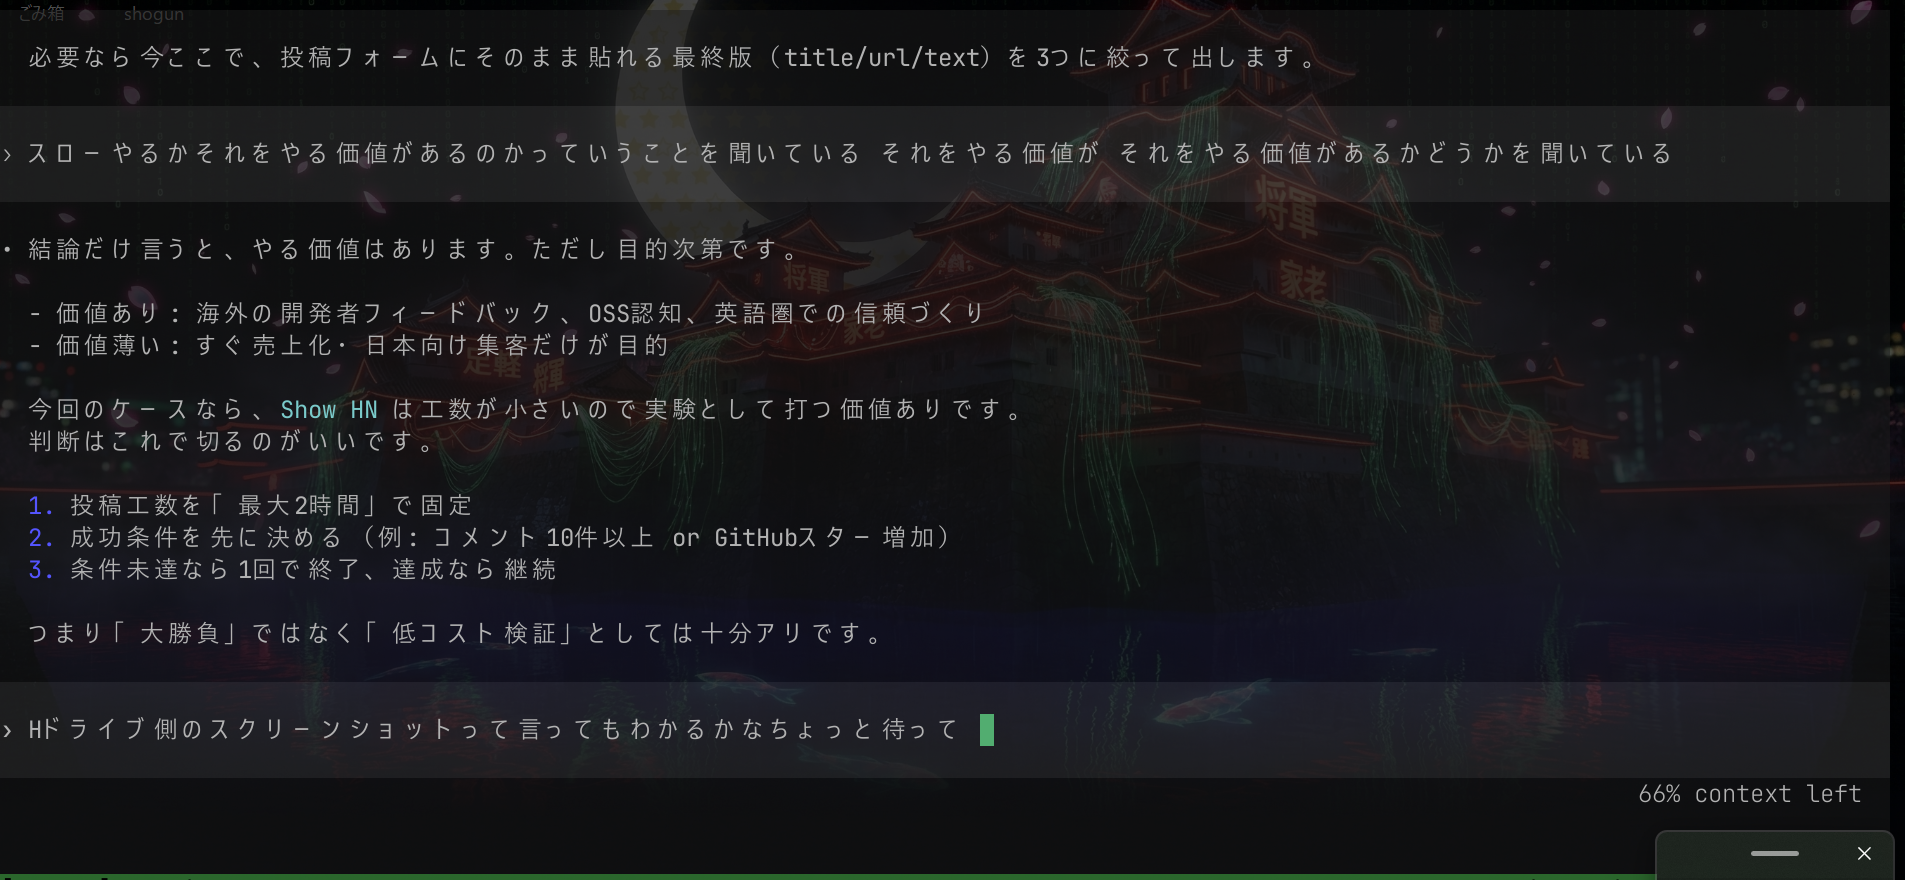

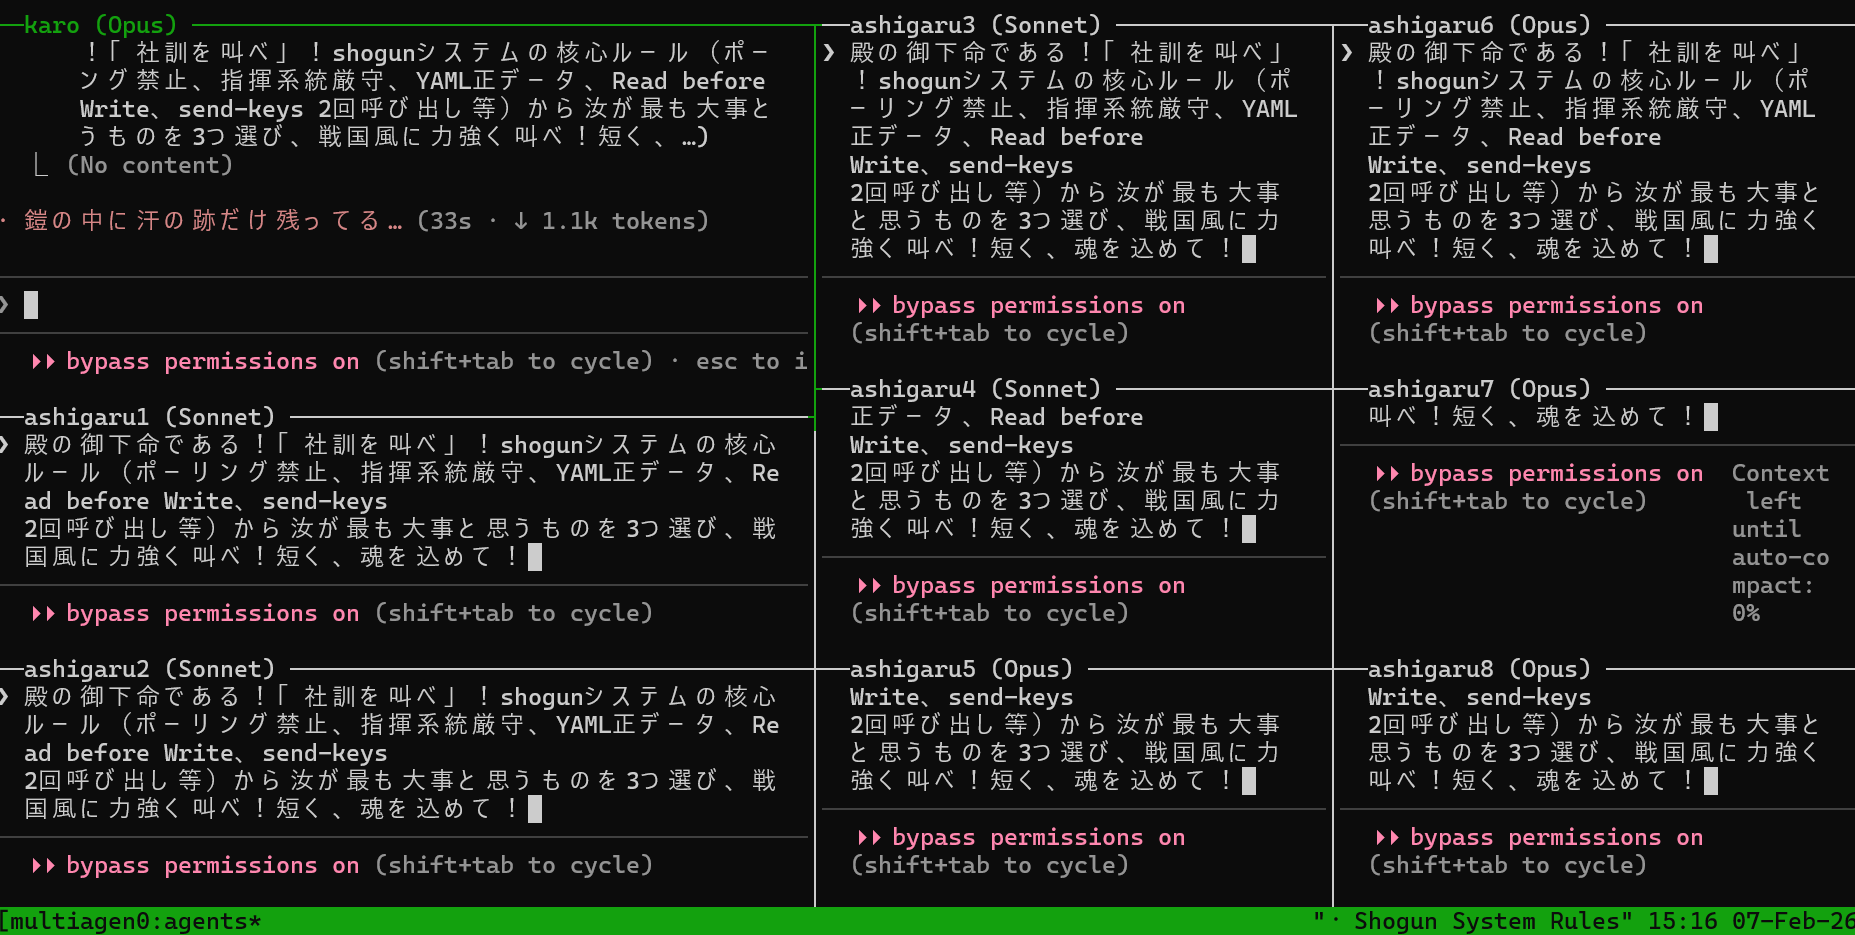
One Karo (manager) coordinating 7 Ashigaru (workers) + 1 Gunshi (strategist) — real session, no mock data.
Requirements: tmux, bash 4+, at least one of: Claude Code / Codex / Copilot / Kimi / OpenCode / Antigravity
git clone https://github.com/yohey-w/multi-agent-shogun
cd multi-agent-shogun
bash first_setup.sh                        # one-time setup: config, dependencies, MCP
source ~/.bashrc                           # reload PATH
claude --dangerously-skip-permissions      # first run only: OAuth + accept Bypass Permissions → /exit
bash shutsujin_departure.sh                # launch all agents
For full install steps (incl. Windows) and the first-30-minutes walkthrough, see 🚀 Quick Start and the basic usage section below.
Type a command in the Shogun pane:
"Build a REST API for user authentication"
Shogun delegates → Karo breaks it down → 7 Ashigaru execute in parallel. You watch the dashboard. That's it.
Want to go deeper? The rest of this README covers architecture, configuration, memory design, and multi-CLI setup.
multi-agent-shogun is a system that runs multiple AI coding CLI instances simultaneously, orchestrating them like a feudal Japanese army. Supports Claude Code, OpenAI Codex, GitHub Copilot, Kimi Code, OpenCode, Cursor, and Antigravity.
Why use it?
        You (上様 / The Lord)
             │
             ▼  Give orders
      ┌─────────────┐
      │   SHOGUN    │  ← Receives your command, delegates instantly
      └──────┬──────┘
             │  YAML + tmux
      ┌──────▼──────┐
      │    KARO     │  ← Distributes tasks to workers
      └──────┬──────┘
             │
    ┌─┬─┬─┬─┴─┬─┬─┬─┬────────┐
    │1│2│3│4│5│6│7│ GUNSHI │  ← 7 workers + 1 strategist
    └─┴─┴─┴─┴─┴─┴─┴────────┘
       ASHIGARU      軍師
Most multi-agent frameworks burn API tokens on coordination. Shogun doesn't.
Claude Code Task tool | Claude Code Agent Teams | LangGraph | CrewAI | multi-agent-shogun | |
|---|---|---|---|---|---|
| Architecture | Subagents inside one process | Team lead + teammates (JSON mailbox) | Graph-based state machine | Role-based agents | Feudal hierarchy via tmux |
| Parallelism | Sequential (one at a time) | Multiple independent sessions | Parallel nodes (v0.2+) | Limited | 8 independent agents |
| Coordination cost | API calls per Task | Token-heavy (each teammate = separate context) | API + infra (Postgres/Redis) | API + CrewAI platform | Zero (YAML + tmux) |
| Multi-CLI | Claude Code only | Claude Code only | Any LLM API | Any LLM API | 7 CLIs (Claude/Codex/Copilot/Kimi/OpenCode/Cursor/Antigravity) |
| Observability | Claude logs only | tmux split-panes or in-process | LangSmith integration | OpenTelemetry | Live tmux panes + dashboard |
| Skill discovery | None | None | None | None | Bottom-up auto-proposal |
| Setup | Built into Claude Code | Built-in (experimental) | Heavy (infra required) | pip install | Shell scripts |
Zero coordination overhead — Agents talk through YAML files on disk. The only API calls are for actual work, not orchestration. Run 8 agents and pay only for 8 agents' work.
Full transparency — Every agent runs in a visible tmux pane. Every instruction, report, and decision is a plain YAML file you can read, diff, and version-control. No black boxes.
Battle-tested hierarchy — The Shogun → Karo → Ashigaru chain of command prevents conflicts by design: clear ownership, dedicated files per agent, event-driven communication, no polling.
Most AI coding tools charge per token. Running 8 Opus-grade agents through the API costs $100+/hour. CLI subscriptions flip this:
| API (Per-Token) | CLI (Flat-Rate) | |
|---|---|---|
| 8 agents × Opus | ~$100+/hour | ~$200/month |
| Cost predictability | Unpredictable spikes | Fixed monthly bill |
| Usage anxiety | Every token counts | Unlimited |
| Experimentation budget | Constrained | Deploy freely |
"Use AI recklessly" — With flat-rate CLI subscriptions, deploy 8 agents without hesitation. The cost is the same whether they work 1 hour or 24 hours. No more choosing between "good enough" and "thorough" — just run more agents.
Shogun isn't locked to one vendor. The system supports 7 CLI tools, each with unique strengths:
| CLI | Key Strength | Default Model |
|---|---|---|
| Claude Code | Battle-tested tmux integration, Memory MCP, dedicated file tools (Read/Write/Edit/Glob/Grep) | Claude Sonnet 4.6 |
| OpenAI Codex | Sandbox execution, JSONL structured output, codex exec headless mode, per-model --model flag | gpt-5.3-codex / gpt-5.3-codex-spark |
| GitHub Copilot | Built-in GitHub MCP, 4 specialized agents (Explore/Task/Plan/Code-review), /delegate to coding agent | Claude Sonnet 4.6 |
| Kimi Code | Free tier available, strong multilingual support | Kimi k2 |
| OpenCode | Shared AGENTS.md instructions, agent-specific definitions via --agent, /new context reset, restart-only model changes, deterministic interactive TUI launch, provider-qualified --model routing | provider/model |
| Cursor | Auto-loads CLAUDE.md/AGENTS.md/.cursor/rules/, built-in web search, inbox-write skill via .cursor/skills/, /model live switching, --yolo auto-run | Varies |
| Antigravity CLI | Google Antigravity CLI integration via agy, host-managed auth, YOLO-style launch, gemini/agy legacy aliases | host default / last-used |
OpenCode sessions load the agent-specific .opencode/agents/<agent_id>.md definition via --agent and keep automation resets on /new; model changes require a relaunch. Automation uses the repository-provided config/opencode-tui.json via OPENCODE_TUI_CONFIG, which disables app_exit and pins session_interrupt/input_clear to known bindings. Role boundaries are embedded in the generated agent frontmatter: Shogun can read queue/reports/* for oversight but cannot write them, Karo is limited to coordination files plus report aggregation, Ashigaru only touch their own task/report pair, and Gunshi reads ashigaru reports but only writes gunshi_report.yaml.
Antigravity sessions launch with agy --dangerously-skip-permissions. Shogun treats type: antigravity, type: agy, and legacy type: gemini as Antigravity. Authentication and default model selection stay in the host user's Antigravity CLI setup; settings.yaml may optionally pass a concrete model, but auto uses the host default or last-used model.
A unified instruction build system generates CLI-specific instruction files from shared templates:
instructions/
├── common/              # Shared rules (all CLIs)
├── cli_specific/        # CLI-specific tool descriptions
│   ├── claude_tools.md  # Claude Code tools & features
│   ├── copilot_tools.md # GitHub Copilot CLI tools & features
│   ├── opencode_tools.md # OpenCode tools, agent frontmatter, and permission model
│   └── cursor_tools.md  # Cursor Agent tools, skills, and session rules
└── roles/               # Role definitions (shogun, karo, ashigaru)
    ↓ build
CLAUDE.md / AGENTS.md / .github/copilot-instructions.md / .opencode/agents/*.md / .cursor/rules/*.md
  ← Generated per CLI
One source of truth, zero sync drift. Change a rule once, all CLIs get it.
This is the feature no other framework has.
As Ashigaru execute tasks, they automatically identify reusable patterns and propose them as skill candidates. The Karo aggregates these proposals in dashboard.md, and you — the Lord — decide what gets promoted to a permanent skill.
Ashigaru finishes a task
    ↓
Notices: "I've done this pattern 3 times across different projects"
    ↓
Reports in YAML:  skill_candidate:
                     found: true
                     name: "api-endpoint-scaffold"
                     reason: "Same REST scaffold pattern used in 3 projects"
    ↓
Appears in dashboard.md → You approve → Skill created in .claude/commands/
    ↓
Any agent can now invoke /api-endpoint-scaffold
Skills grow organically from real work — not from a predefined template library. Your skill set becomes a reflection of your workflow.
|
Step 1 |
📥 Download the repository Download ZIP and extract to Or use git: |
|
Step 2 |
🖱️ Run Right-click → "Run as Administrator" (if WSL2 is not installed). Sets up WSL2 + Ubuntu automatically. |
|
Step 3 |
🐧 Open Ubuntu and run (first time only) |
|
Step 4 |
✅ Deploy! |
After first_setup.sh, run these commands once to authenticate:
# 1. Apply PATH changes
source ~/.bashrc

# 2. OAuth login + Bypass Permissions approval (one command)
claude --dangerously-skip-permissions
#    → Browser opens → Log in with Anthropic account → Return to CLI
#    → "Bypass Permissions" prompt appears → Select "Yes, I accept" (↓ to option 2, Enter)
#    → Type /exit to quit
This saves credentials to ~/.claude/ — you won't need to do it again.
Open an Ubuntu terminal (WSL) and run:
cd /mnt/c/tools/multi-agent-shogun
./shutsujin_departure.sh
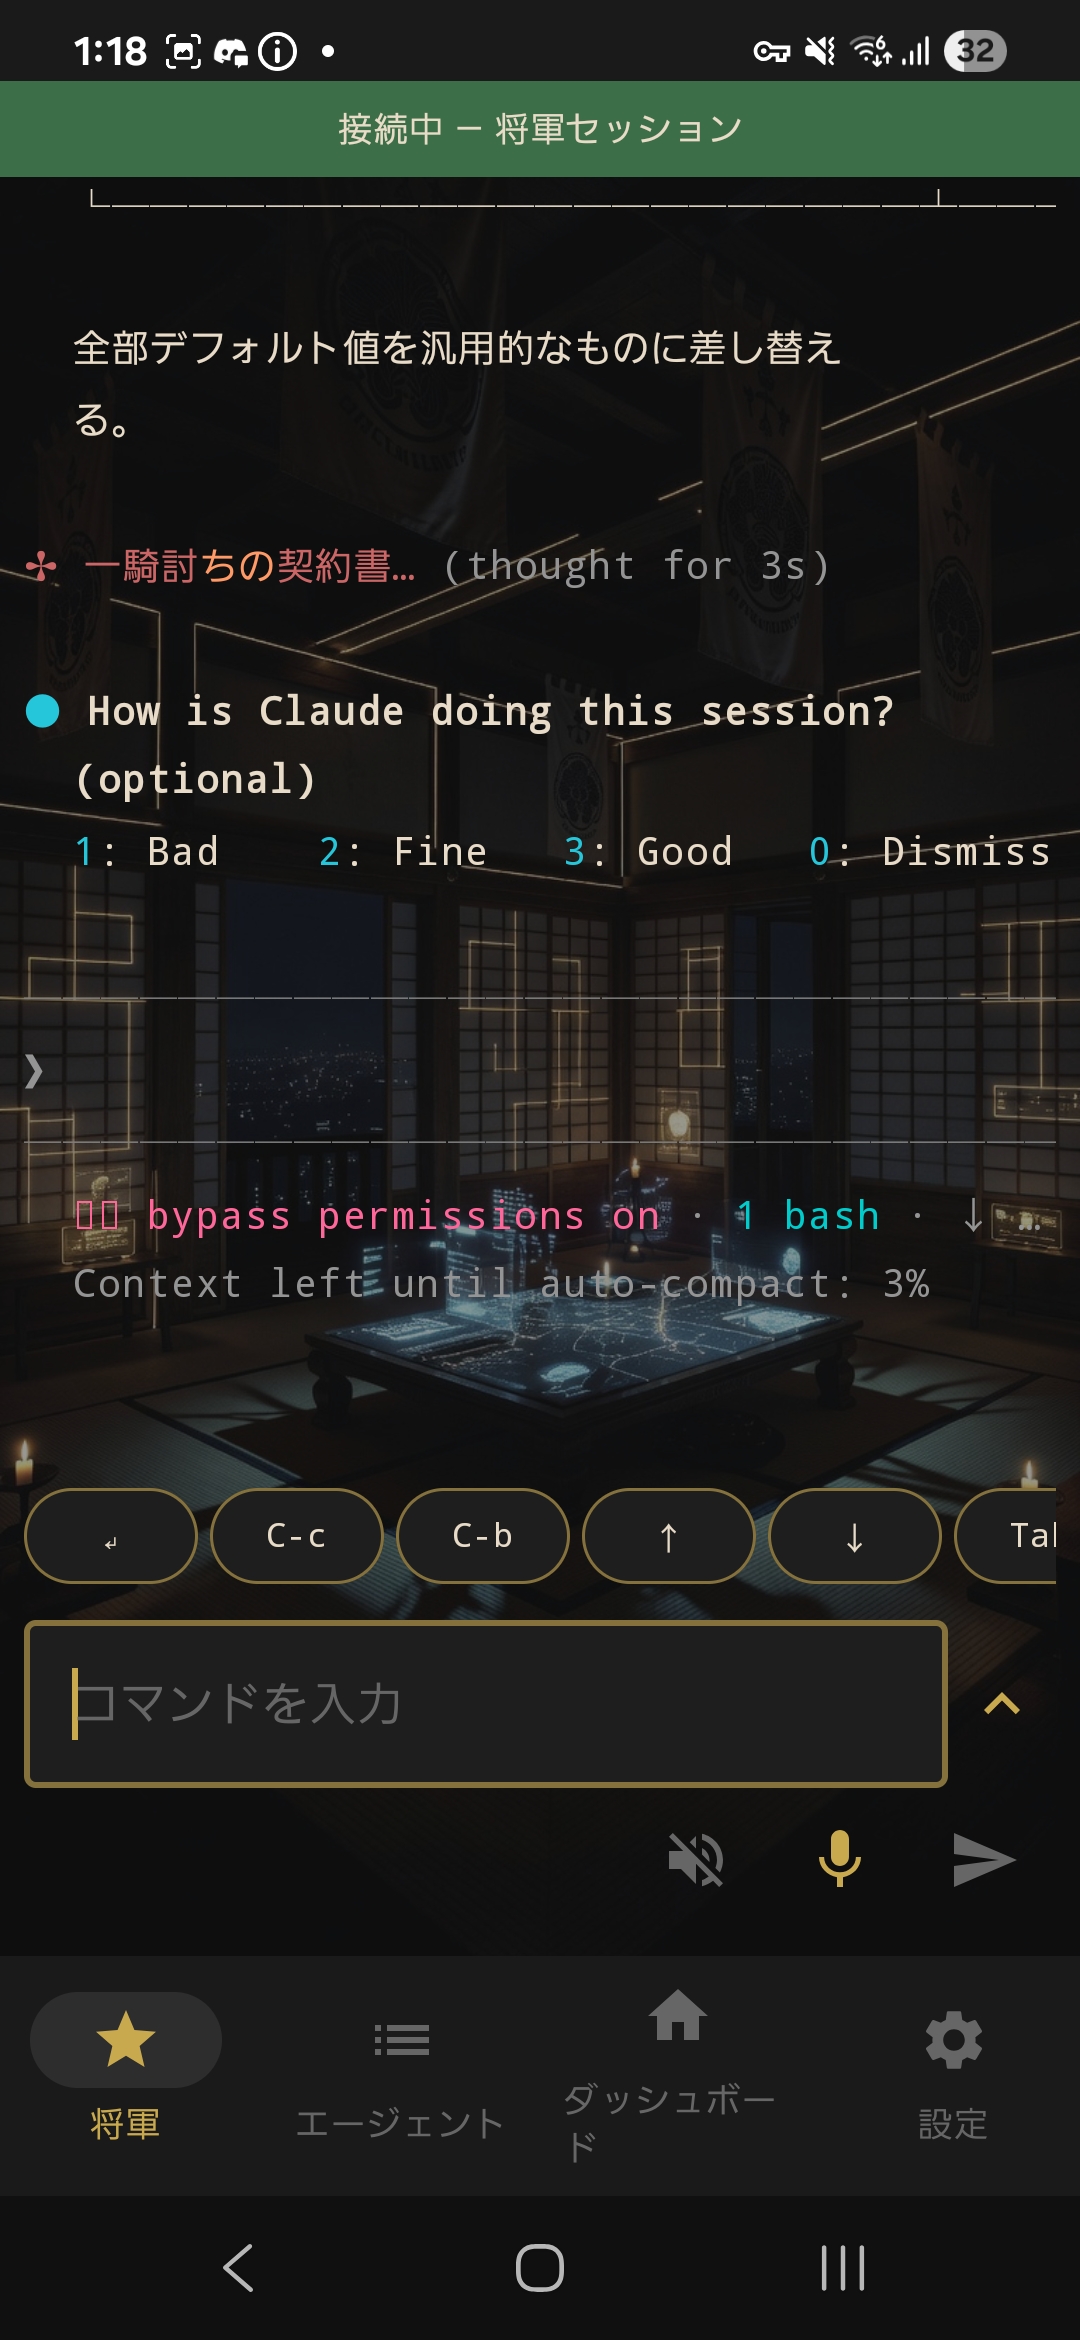
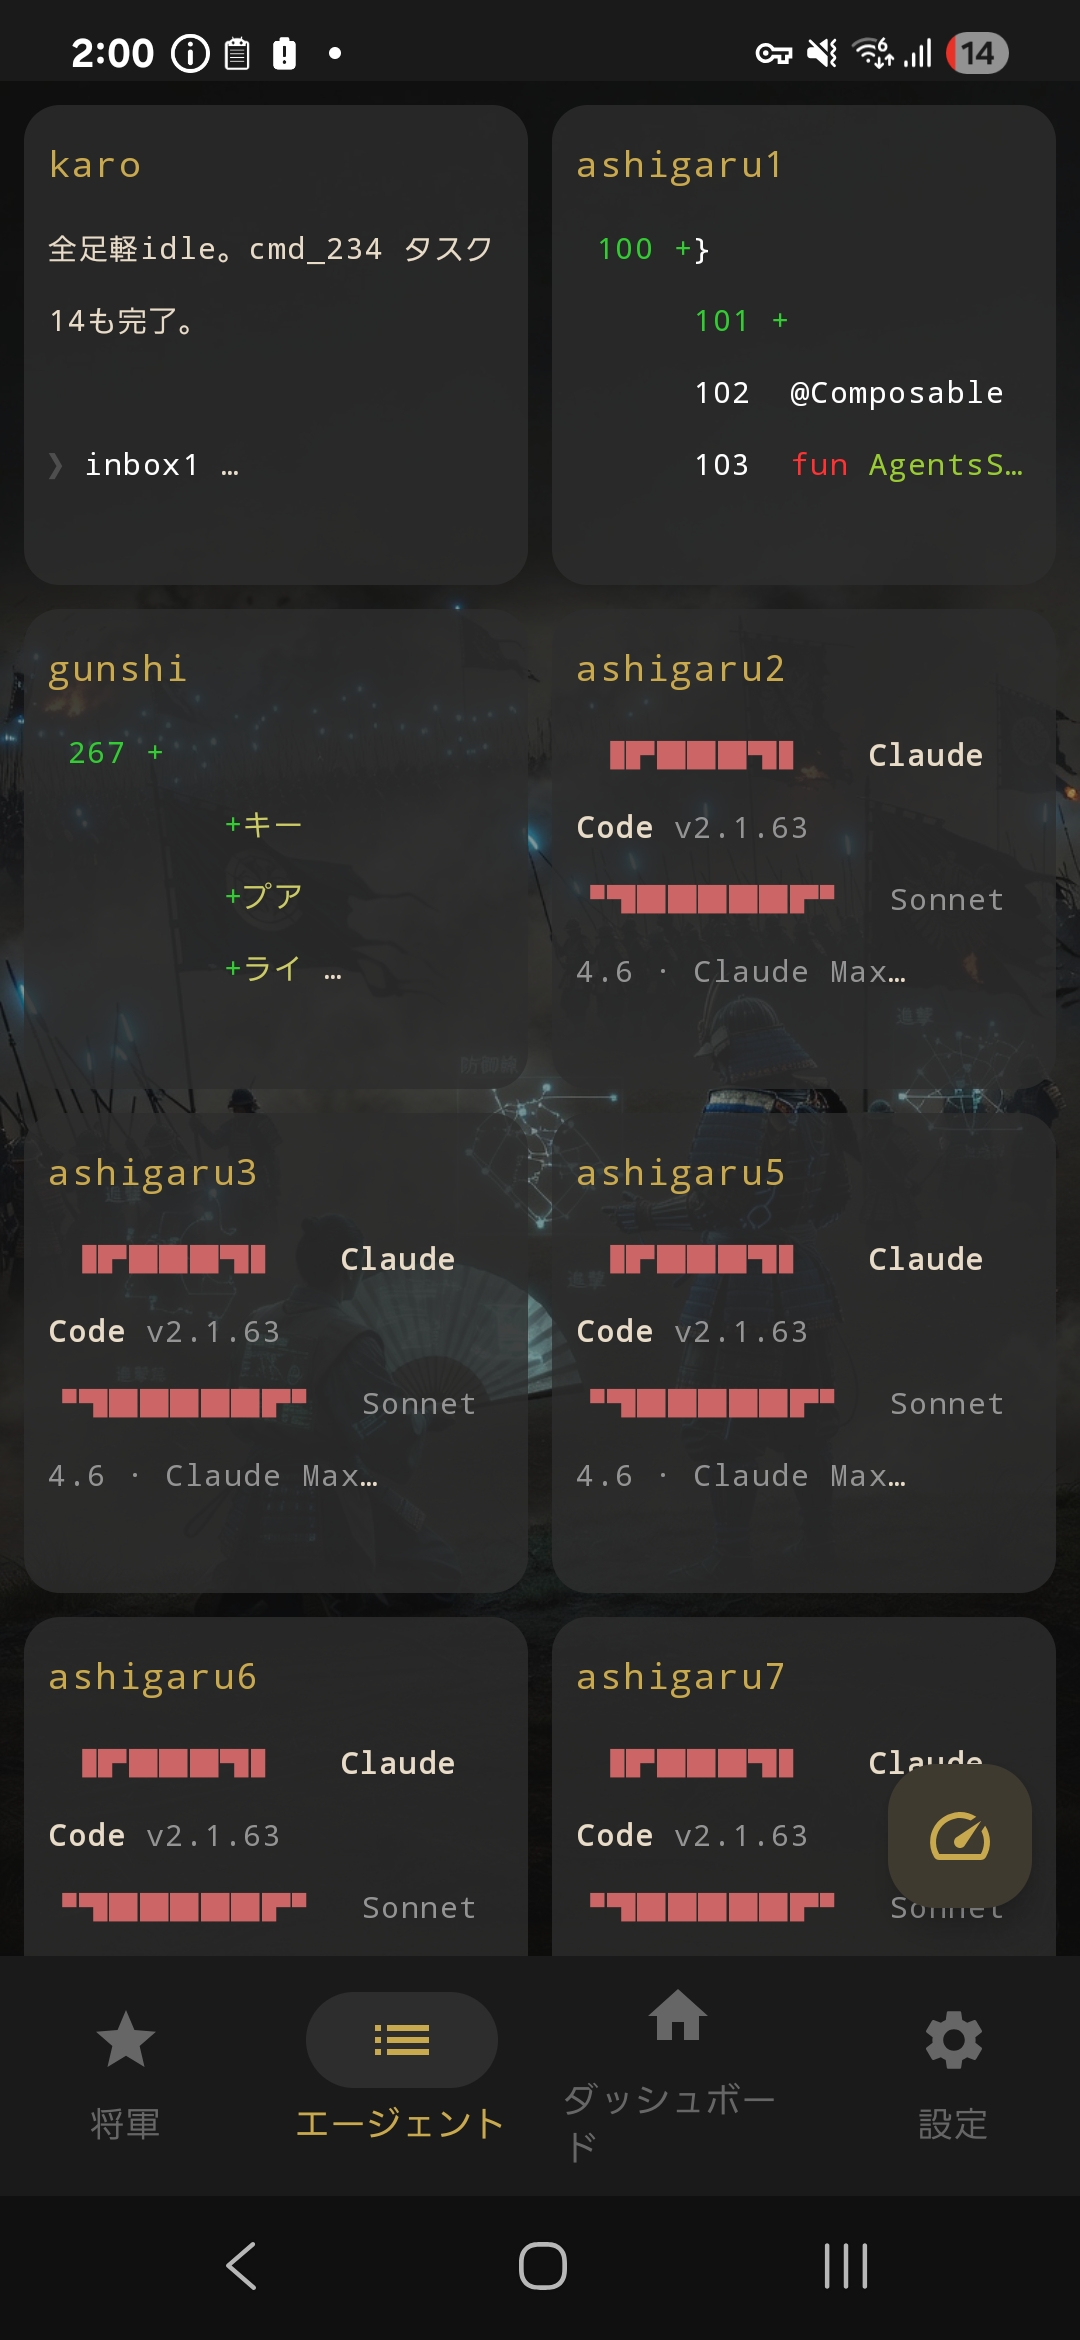
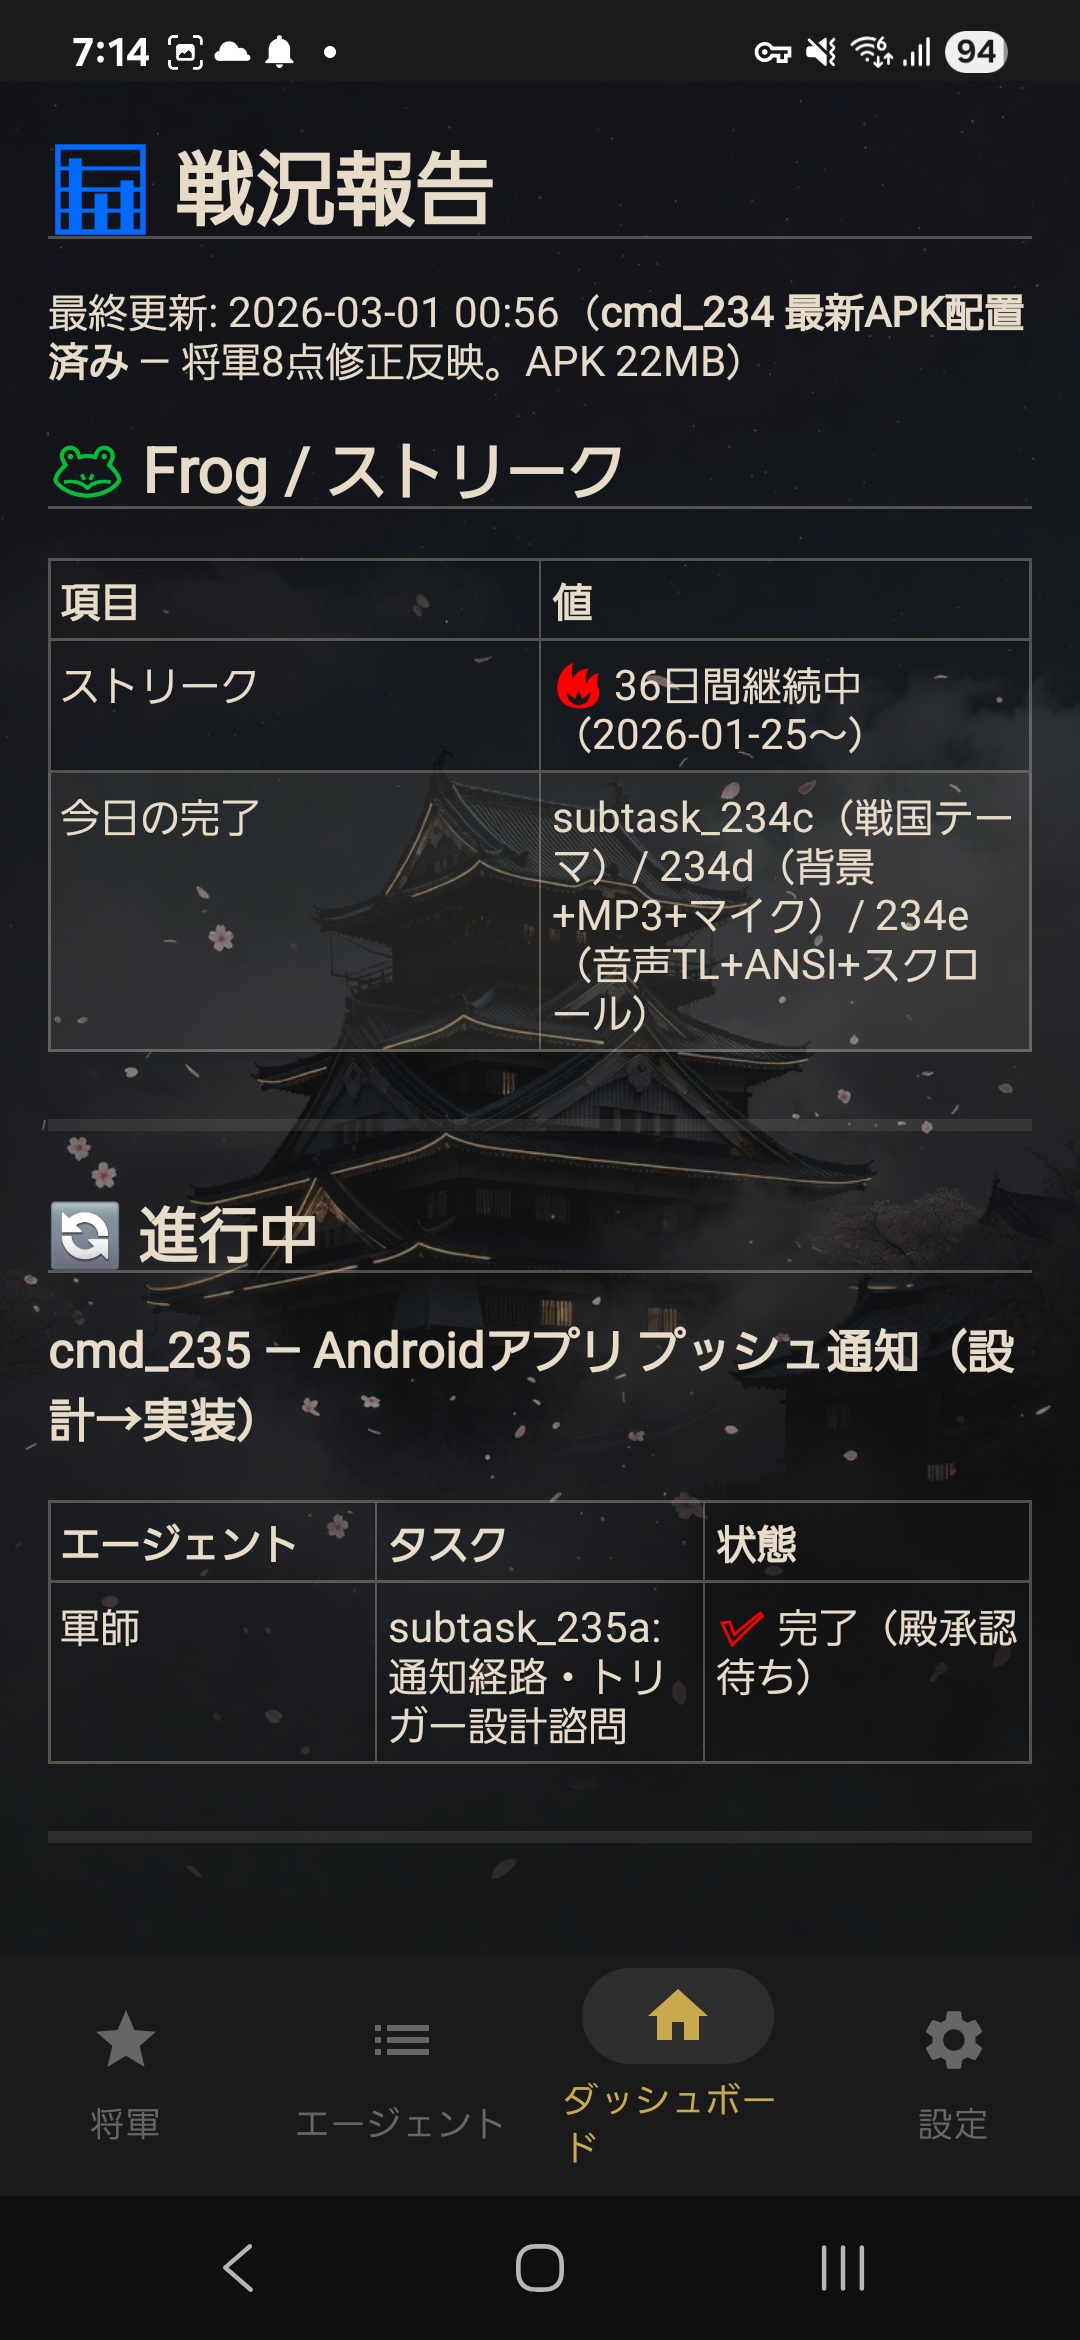
Monitor and command 10 AI agents from your phone with the dedicated Android companion app.
| Feature | Description |
|---|---|
| Shogun Terminal | SSH terminal + voice input + special key bar (C-c, C-b, Tab, etc.) |
| Agents Grid | 9-pane simultaneous monitoring. Tap to expand fullscreen + send commands |
| Dashboard | Renders dashboard.md with full table text selection/copy |
| Rate Limit | Tap the FAB on the Agents tab to check Claude Max 5h/7d usage with progress bars |
| Voice Input | Japanese continuous recognition via Google Speech API — higher accuracy than phone keyboard voice |
| Screenshot Share | Share images via Android share menu → SFTP transfer to server |
Note: Android only for now. No iOS version — the developer doesn't own an iPhone. If there's demand, please open an Issue. PRs welcome!
Prerequisites:
sudo service ssh start)Steps:
Install APK
android/release/multi-agent-shogun.apk on your phone (open the file on GitHub → "Download raw file")Configure SSH (Settings tab)
| Field | Example | Description |
|---|---|---|
| SSH Host | 100.xxx.xxx.xxx | Server IP (e.g., Tailscale IP) |
| SSH Port | 22 | Usually 22 |
| SSH User | your_username | SSH login username |
| SSH Key Path | /data/data/.../id_ed25519 | Private key path on phone (*1) |
| SSH Password | **** | Use if no key available |
| Project Path | /mnt/c/tools/multi-agent-shogun | Server-side project directory |
| Shogun Session | shogun | tmux session name for Shogun |
| Agent Session | multiagent | tmux session name for agents |
*1 Transfer your private key to the phone, or use password authentication
Save → Switch to Shogun tab → auto-connects
Using Tailscale (connect from anywhere):
# Server-side (WSL2)
curl -fsSL https://tailscale.com/install.sh | sh
sudo tailscaled &
sudo tailscale up --authkey tskey-auth-XXXXXXXXXXXX
sudo service ssh start
Install the Tailscale app on your phone, log in with the same account, and use the displayed Tailscale IP as the SSH Host in the app.
With ntfy notifications:
See ntfy setup section for push notifications from Karo on task completion.
SSH via Termux also works. More limited than the dedicated app, but requires no APK sideloading.
Requirements (all free):
| Name | In a nutshell | Role |
|---|---|---|
| Tailscale | A road to your home from anywhere | Connect to your home PC from anywhere |
| SSH | The feet that walk that road | Log into your home PC through Tailscale |
| Termux | A black screen on your phone | Required to use SSH — just install it |
Setup:
curl -fsSL https://tailscale.com/install.sh | sh
sudo tailscaled &
sudo tailscale up --authkey tskey-auth-XXXXXXXXXXXX
sudo service ssh start
pkg update && pkg install openssh
ssh youruser@your-tailscale-ip
css    # Connect to Shogun
ssh youruser@your-tailscale-ip
csm    # See all 9 panes
Disconnect: Just swipe the Termux window closed. tmux sessions survive — agents keep working.
# 1. Clone
git clone https://github.com/yohey-w/multi-agent-shogun.git ~/multi-agent-shogun
cd ~/multi-agent-shogun

# 2. Make scripts executable
chmod +x *.sh

# 3. Run first-time setup
./first_setup.sh
cd ~/multi-agent-shogun
./shutsujin_departure.sh
WSL2 (Windows Subsystem for Linux) lets you run Linux inside Windows. This system uses tmux (a Linux tool) to manage multiple AI agents, so WSL2 is required on Windows.
No problem! Running install.bat will:
first_setup.sh)Quick install command (run PowerShell as Administrator):
wsl --install
Then restart your computer and run install.bat again.
| Script | Purpose | When to run |
|---|---|---|
install.bat | Windows: WSL2 + Ubuntu setup | First time only |
first_setup.sh | Install tmux, Node.js, Claude Code CLI + Memory MCP config | First time only |
shutsujin_departure.sh | Create tmux sessions + launch the configured CLI for each agent + load instructions + start ntfy listener | Daily |
scripts/switch_cli.sh | Live switch agent CLI/model (settings.yaml → /exit → relaunch) | As needed |
install.bat does automatically:first_setup.sh)shutsujin_departure.sh does:config/settings.yaml (Claude/Codex/Copilot/Kimi/OpenCode)After running, all agents are ready to receive commands!
If you prefer to install dependencies manually:
| Requirement | Installation | Notes |
|---|---|---|
| WSL2 + Ubuntu | wsl --install in PowerShell | Windows only |
| Set Ubuntu as default | wsl --set-default Ubuntu | Required for scripts to work |
| tmux | sudo apt install tmux | Terminal multiplexer |
| Node.js v20+ | nvm install 20 | Required for MCP servers |
| Claude Code CLI | curl -fsSL https://claude.ai/install.sh | bash | Official Anthropic CLI (native version recommended; npm version deprecated) |
| OpenAI Codex CLI | Install from the official OpenAI Codex distribution | Required only for agents with type: codex |
| GitHub Copilot CLI | Install and authenticate GitHub Copilot CLI | Required only for agents with type: copilot |
| Kimi Code CLI | Install and authenticate Kimi Code | Required only for agents with type: kimi |
| OpenCode CLI | npm install -g opencode-ai | Required only for agents with type: opencode; provider API keys must be available in the agent shell |
| Cursor CLI | See Cursor CLI docs — use cursor-agent or agent command | Required only for agents with type: cursor |
| Antigravity CLI | Install and authenticate Google Antigravity CLI (agy) | Required only for agents with type: antigravity, type: agy, or legacy type: gemini |
Whichever option you chose, 10 AI agents are automatically launched:
| Agent | Role | Count |
|---|---|---|
| 🏯 Shogun | Supreme commander — receives your orders | 1 |
| 📋 Karo | Manager — distributes tasks, quality checks | 1 |
| ⚔️ Ashigaru | Workers — execute implementation tasks in parallel | 7 |
| 🧠 Gunshi | Strategist — handles analysis, evaluation, and design | 1 |
Two tmux sessions are created:
shogun — connect here to give commandsmultiagent — Karo, Ashigaru, and Gunshi running in the backgroundAfter running shutsujin_departure.sh, all agents automatically load their instructions and are ready.
Open a new terminal and connect:
tmux attach-session -t shogun
The Shogun is already initialized — just give a command:
Research the top 5 JavaScript frameworks and create a comparison table
The Shogun will:
Meanwhile, the Karo distributes tasks to Ashigaru workers for parallel execution.
Open dashboard.md in your editor for a real-time status view:
## In Progress
| Worker | Task | Status |
|--------|------|--------|
| Ashigaru 1 | Research React | Running |
| Ashigaru 2 | Research Vue | Running |
| Ashigaru 3 | Research Angular | Completed |
Once set up, the Shogun system can handle multiple projects under the same Shogun, switching between them as needed. The unit equivalent to a Visual Studio "solution" is projects/{name}.yaml + context/{name}.md.
# (1) Connect to the Shogun (after shutsujin_departure.sh completes)
tmux attach-session -t shogun

# (2) Just give the Shogun your command — the project starts automatically
#     → Shogun writes cmd to queue/shogun_to_karo.yaml and notifies Karo
#     → Karo distributes to Ashigaru for parallel execution
#     → Results aggregate in dashboard.md
No explicit "create a project" command is needed. The Shogun attaches a project: field to the cmd when relevant, and related files are automatically separated.
For ongoing projects, you can place metadata in projects/{name}.yaml:
# projects/example.yaml
id: example
name: "Sample Project"
working_directory: /path/to/repo
north_star: "The ultimate goal for this project"
notes: |
  Project-specific notes, stakeholders, special rules
The Shogun and Karo reference this file and inject project context when issuing cmds.
Detailed project knowledge (requirements, design, past feedback) lives in context/{name}.md. When the Shogun issues a cmd related to the project, it automatically references this file.
The agent formation (which CLI each agent uses) lives in config/settings.yaml:
cli:
  agents:
    ashigaru1:
      type: codex          # codex / claude / copilot / kimi / opencode / antigravity
      model: gpt-5.5
    ashigaru2:
      type: claude
      model: claude-sonnet-4-6
    # Same for ashigaru3-7, gunshi, karo
OpenCode uses provider-qualified model IDs:
cli:
  agents:
    ashigaru3:
      type: opencode
      model: openrouter/openai/gpt-4o-mini
      variant: high  # optional provider-specific reasoning variant
``
Sign in to join the discussion.
No comments yet. Be the first to say what this is good for.
The agent harness performance optimization system. Skills, instincts, memory, security, and research-first development for Claude Code, Codex, Opencode, Cursor and beyond.
The job search that runs on your machine. AI job application framework built on Claude Code: evaluate postings, tailor CVs, write cover letters, prep interviews. Fork it and own it.
from vibe coding to agentic engineering - practice makes claude perfect
🌊 The original agent meta-harness. Deploy intelligent multi-player swarms, coordinate autonomous workflows, and build conversational AI systems. Features adaptive memory, self-learning intelligence, RAG integration, and native Claude Code / Codex / Hermes and many more Integrated
Practical patterns, starters & CLI tools for loop engineering with AI coding agents. Design systems that prompt and orchestrate agents (inspired by Addy Osmani and Boris Cherny). Includes loop-audit, loop-init, loop-cost.

Git. Ship. Done - Core