
JuliusBrussee/
caveman

🪨 why use many token when few token do trick — Claude Code skill that cuts 65% of tokens by talking like caveman
105k
1 add
Z-Image Studio wraps the Z-Image-Turbo text-to-image model in three ways: a CLI, a web interface, and an MCP server. It handles local inference, model precision selection, LoRA loading, history, and outputs for supported hardware.
Builders who want their agent or local machine to generate images with Z-Image-Turbo.
You can generate and manage images from the terminal, browser, or an agent without wiring up the model yourself.
Run `zimg generate` or `zimg gen` to create images from prompts with seed, size, precision, and LoRA options.
Use a browser-based interface with history browsing, multilingual support, sharing, theme switching, and mobile layout.
Expose `generate`, `list_models`, and `list_history` over stdio, SSE, or Streamable HTTP for agent use.
Detects and uses CUDA, ROCm, Intel XPU, Apple Silicon MPS, or CPU fallback.
Lists available model precisions and clears local cached model files from the CLI.
uv tool install git+https://github.com/iconben/z-image-studio.git
# or, if you have the repo cloned locally:
# git clone https://github.com/iconben/z-image-studio.git
# cd z-image-studio
# uv tool install .
zimg --help
uv tool upgrade z-image-studio
# or, if you have the repo cloned locally, you pull the latest source code:
# git pull
docker compose up -d
docker compose up -d
docker run -d \
  --name z-image-studio \
  -p 8000:8000 \
  -v zimg-data:/data \
  -v zimg-config:/home/appuser/.z-image-studio \
  -v zimg-outputs:/data/outputs \
  iconben/z-image-studio:latest









A Cli, a webUI, and a MCP server for the Z-Image-Turbo text-to-image generation model (Tongyi-MAI/Z-Image-Turbo and its variants).
This tool is designed to run efficiently on local machines for Windows/Mac/Linux users. It features specific optimizations for NVIDIA (CUDA), AMD on Linux (ROCm), Intel (XPU), and Apple Silicon (MPS), falling back to CPU if no compatible GPU is detected.
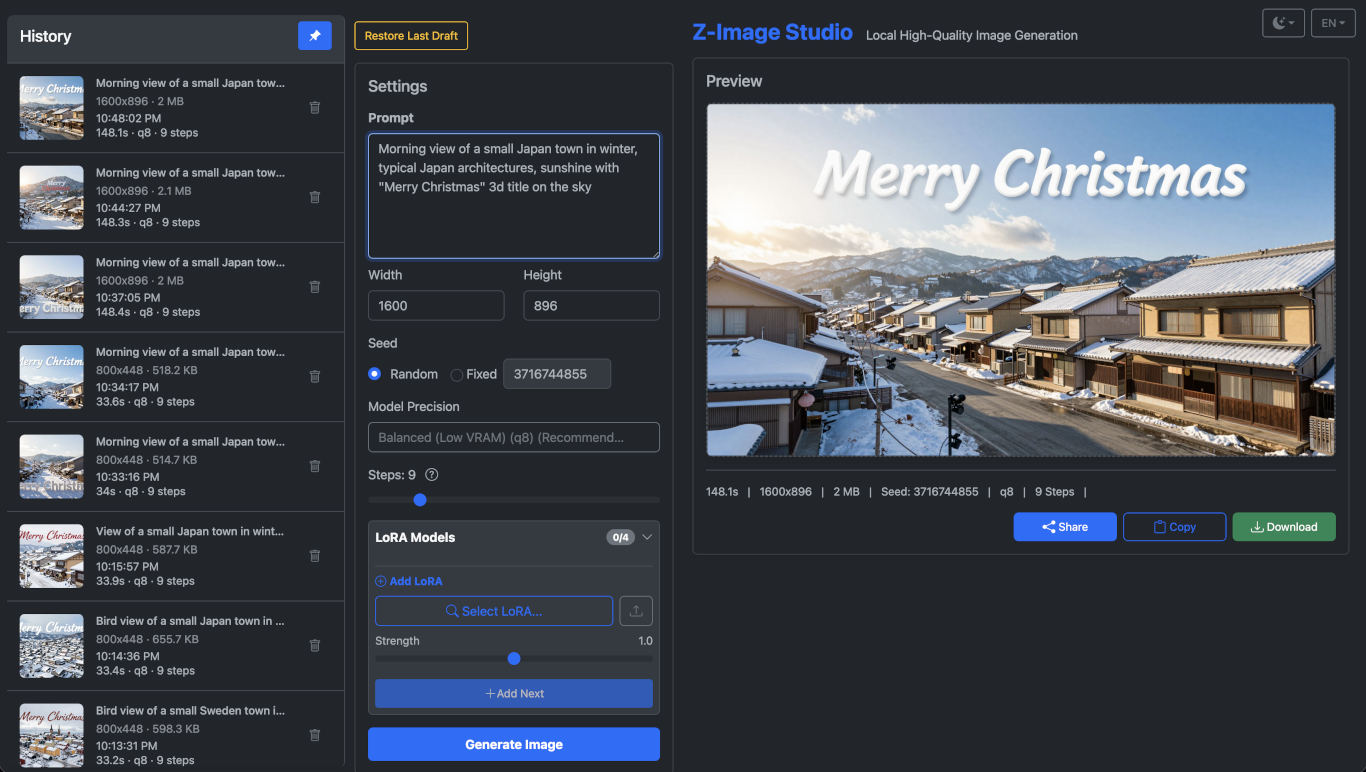
Hybrid Interfaces:
Tongyi-MAI/Z-Image-Turbo model and quatized variants via diffusers.--lora entries with optional strengths.zimg mcp, zimg-mcp) for local agents, SSE available at /mcp-sse, and MCP 2025-03-26 Streamable HTTP transport at /mcp./mcp) first for optimal performance, falling back to SSE (/mcp-sse) if needed.uv (recommended for dependency management)Python 3.12+ Note: torch.compile is disabled by default for Python 3.12+ due to known compatibility issues with the Z-Image model architecture. If you want to experiment with torch.compile on Python 3.12+, set ZIMAGE_ENABLE_TORCH_COMPILE=1 via environment variable or in ~/.z-image-studio/config.json (experimental, may cause errors).
Note: AMD GPU support currently requires ROCm, which is only available for Linux PyTorch builds. Windows users with AMD GPUs will currently fall back to CPU.
pip install torch --index-url https://download.pytorch.org/whl/rocm6.1 or similar). Ensure the PyTorch ROCm version matches your installed driver version.zimg models.torch.version.hip is detected.HSA_OVERRIDE_GFX_VERSION (e.g., 10.3.0 for RDNA2, 11.0.0 for RDNA3).torch.compile is disabled by default on ROCm due to experimental support. You can force-enable it with ZIMAGE_ENABLE_TORCH_COMPILE=1 if your setup (Triton/ROCm version) supports it.zimg models.If you just want the zimg CLI to be available from anywhere, install it as a uv tool:
uv tool install git+https://github.com/iconben/z-image-studio.git
# or, if you have the repo cloned locally:
# git clone https://github.com/iconben/z-image-studio.git
# cd z-image-studio
# uv tool install .
After this, the zimg command is available globally:
zimg --help
To update z-image-studio:
uv tool upgrade z-image-studio
# or, if you have the repo cloned locally, you pull the latest source code:
# git pull
For Windows users, a pre-built installer is available that bundles everything you need:
Z-Image-Studio-Windows-x64-x.x.x.exeC:\Program Files\Z-Image Studio%LOCALAPPDATA%\z-image-studio (contains database, LoRAs, and outputs)Run Z-Image Studio in a container with Docker:
# Create persistent volume
docker volume create zimg-data

# Run the container
docker run -d \
  --name z-image-studio \
  -p 8000:8000 \
  -v zimg-data:/data \
  -v zimg-config:/home/appuser/.z-image-studio \
  -v zimg-outputs:/data/outputs \
  iconben/z-image-studio:latest
Then open http://localhost:8000 in your browser.
Create a docker-compose.yml file:
services:
  z-image-studio:
    image: iconben/z-image-studio:latest
    container_name: z-image-studio
    ports:
      - "8000:8000"
    volumes:
      - zimg-data:/data
      - zimg-config:/home/appuser/.z-image-studio
      - zimg-outputs:/data/outputs
    restart: unless-stopped

volumes:
  zimg-data:
  zimg-config:
  zimg-outputs:
Then run:
docker compose up -d
NVIDIA GPU:
services:
  z-image-studio:
    image: iconben/z-image-studio:latest
    container_name: z-image-studio
    ports:
      - "8000:8000"
    volumes:
      - zimg-data:/data
      - zimg-config:/home/appuser/.z-image-studio
      - zimg-outputs:/data/outputs
    deploy:
      resources:
        reservations:
          devices:
            - driver: nvidia
              count: all
              capabilities: [gpu]
    restart: unless-stopped

volumes:
  zimg-data:
  zimg-config:
  zimg-outputs:
AMD GPU (Linux):
services:
  z-image-studio:
    image: iconben/z-image-studio:latest
    container_name: z-image-studio
    ports:
      - "8000:8000"
    volumes:
      - zimg-data:/data
      - zimg-config:/home/appuser/.z-image-studio
      - zimg-outputs:/data/outputs
    devices:
      - /dev/dri:/dev/dri
    restart: unless-stopped

volumes:
  zimg-data:
  zimg-config:
  zimg-outputs:
Then run:
docker compose up -d
Basic:
docker run -d \
  --name z-image-studio \
  -p 8000:8000 \
  -v zimg-data:/data \
  -v zimg-config:/home/appuser/.z-image-studio \
  -v zimg-outputs:/data/outputs \
  iconben/z-image-studio:latest
NVIDIA GPU:
docker run -d \
  --name z-image-studio \
  -p 8000:8000 \
  --gpus all \
  -v zimg-data:/data \
  -v zimg-config:/home/appuser/.z-image-studio \
  -v zimg-outputs:/data/outputs \
  iconben/z-image-studio:latest
AMD GPU (Linux):
docker run -d \
  --name z-image-studio \
  -p 8000:8000 \
  --device /dev/dri:/dev/dri \
  -v zimg-data:/data \
  -v zimg-config:/home/appuser/.z-image-studio \
  -v zimg-outputs:/data/outputs \
  iconben/z-image-studio:latest
The container uses Docker volumes for persistence:
| Volume | Path | Description |
|---|---|---|
zimg-data | /data | Database and LoRA storage |
zimg-outputs | /data/outputs | Generated images |
zimg-config | /home/appuser/.z-image-studio | User configuration |
Note: The data directories (/data and /data/outputs) are set as defaults in the Dockerfile. Override with environment variables only if needed.
| Variable | Default | Description |
|---|---|---|
HOST | 0.0.0.0 | Server bind host |
PORT | 8000 | Server bind port |
ZIMAGE_BASE_URL | Auto | Base URL for generated links |
ZIMAGE_DISABLE_MCP | 0 | Disable MCP endpoints |
ZIMAGE_ENABLE_TORCH_COMPILE | Auto | Force torch.compile |
Mount source code for development:
docker run -d \
  --name z-image-studio-dev \
  -p 8000:8000 \
  -v $(pwd)/src:/app/src \
  -v zimg-data:/data \
  -e DEBUG=1 \
  iconben/z-image-studio:latest
# View logs
docker logs -f z-image-studio

# Stop container
docker stop z-image-studio

# Remove container (data preserved)
docker rm z-image-studio

# Remove all data
docker volume rm zimg-data zimg-outputs zimg-config
Install Z-Image Studio via pip or uv:
pip install z-image-studio
# or
uv pip install z-image-studio
After installation, the zimg command is available globally:
zimg --help
git clone https://github.com/iconben/z-image-studio.git
cd z-image-studio
pip install -e .
# or
uv pip install -e .
After installation, you can use the zimg command directly from your terminal.
Generate images directly from the command line using the generate (or gen) subcommand.
# Basic generation
zimg generate "A futuristic city with neon lights"

# Using the alias 'gen'
zimg gen "A cute cat"

# Custom output path
zimg gen "A cute cat" --output "my_cat.png"

# High quality settings
zimg gen "Landscape view" --width 1920 --height 1080 --steps 20

# With a specific seed for reproducibility
zimg gen "A majestic dragon" --seed 12345

# Select model precision (full, q8, q4)
zimg gen "A futuristic city" --precision q8

# Skip writing to history DB
zimg gen "Quick scratch" --no-history
Launch the web interface to generate images interactively.
# Start server on default port (http://localhost:8000)
zimg serve

# Start on custom host/port
zimg serve --host 0.0.0.0 --port 9090
Once started, open your browser to the displayed URL.
Run Z-Image Studio as an MCP server:
# stdio transport (ideal for local agents/tools); also available as `zimg mcp`
zimg-mcp

# MCP transports are available when you run the web server:
zimg serve          # Both Streamable HTTP (/mcp) and SSE (/mcp-sse) available
zimg serve --disable-mcp   # Disable all MCP endpoints
Available tools: generate (prompt to image), list_models, and list_history. Logs are routed to stderr to keep MCP stdio clean.
zimg-mcpEnsure dependencies are installed (uv sync) and that zimg-mcp is on PATH (installed via uv tool install . or run locally via uv run zimg-mcp).
In Claude Desktop (or any MCP-aware client), add a local mcp server entry like:
{
  "mcpServers": {
    "z-image-studio": {
      "command": "zimg-mcp",
      "args": [],
      "env": {}
    }
  }
}
Adjust the command to a full path if not on PATH. If the agent cannot find the zimg-mcp command, you can also try setting the path in environment.
Different agents may have slightly different parameters, for example, cline will timeout fast if you do not explicitly set a timeout parameter. Here is the example for cline:
{
  "mcpServers": {
    "z-image-studio": {
      "command": "zimg-mcp",
      "type": "stdio",
      "args": [],,
      "env": {},
      "disabled": false,
      "autoApprove": [],
      "timeout": 300
    }
  }
}
Detailed syntax may vary, please refer to the specific agent's documentation.
For Clients that support remote mcp server, configure the client with the streamable Http mcp endpoint URL (meanwhile keep the server up by running zimg serve). Here is an example for Gemini CLI:
{
  "mcpServers": {
    "z-image-studio": {
      "httpUrl": "http://localhost:8000/mcp"
    }
  }
}
Detailed syntax may vary, please refer to the specific agent's documentation.
For legacy SSE , run zimg serve and configure the client with the SSE endpoint URL. Here is an example for Cline CLI:
{
  "mcpServers": {
    "z-image-studio": {
      "url": "http://localhost:8000/mcp-sse/sse"
    }
  }
}
Detailed syntax may vary, please refer to the specific agent's documentation.
The agent will receive tools: generate, list_models, list_history.
The generate tool returns a consistent content array with three items in this order:
TextContent: Enhanced metadata including generation info, file details, and preview metadata
{
  "message": "Image generated successfully",
  "duration_seconds": 1.23,
  "width": 1280,
  "height": 720,
  "precision": "q8",
  "model_id": "z-image-turbo-q8",
  "seed": 12345,
  "filename": "image_12345.png",
  "file_path": "/absolute/path/to/image_12345.png",
  "access_note": "Access full image via ResourceLink.uri or this URL",
  "preview": true,
  "preview_size": 400,
  "preview_mime": "image/png"
}
url and access_note point to the absolute image URLfile_path and access_note point to the local file pathResourceLink: Main image file reference with context-appropriate URI
URI Building Priority (SSE/Streamable HTTP):
Example with Context parameter:
@mcp.tool()
async def generate_with_context(..., ctx: Context) -> ...:
    request = ctx.request_context.request
    proto = request.headers.get('x-forwarded-proto', 'http')
    host = request.headers.get('x-forwarded-host', 'localhost')
    return ResourceLink(uri=f"{proto}://{host}/outputs/image.png", ...)
{
  "type": "resource_link",
  "name": "image_12345.png",
  "uri": "https://example.com/outputs/image_12345.png",
  "mimeType": "image/png"
}
ImageContent: Thumbnail preview (base64 PNG, max 400px)
{
  "data": "base64-encoded-png-data",
  "mimeType": "image/png"
}
This structure ensures:
generate (alias: gen)| Argument | Short | Type | Default | Description |
|---|---|---|---|---|
prompt | str | Required | The text prompt for image generation. | |
--output | -o | str | None | Custom output filename. Defaults to outputs/<prompt-slug>.png inside the data directory. |
--steps | int | 9 | Number of inference steps. Higher usually means better quality. | |
--width | -w | int | 1280 | Image width (automatically adjusted to be a multiple of 8). |
--height | -H | int | 720 | Image height (automatically adjusted to be a multiple of 8). |
--seed | int | None | Random seed for reproducible generation. | |
--precision | str | q8 | Model precision (full, q8, q4). q8 is the default and balanced, full is higher quality but slower, q4 is fastest and uses less memory. | |
--lora | str | [] | LoRA filename or path, optionally with strength (name.safetensors:0.8). Can be passed multiple times (max 4); strength is clamped to -1.0..2.0. | |
--no-history | bool | False | Do not record this generation in the history database. |
serve| Argument | Type | Default | Description |
|---|---|---|---|
--host | str | 0.0.0.0 | Host to bind the server to. |
--port | int | 8000 | Port to bind the server to. |
--reload | bool | False | Enable auto-reload (for development). |
--timeout-graceful-shutdown | int | 5 | Seconds to wait for graceful shutdown before forcing exit. |
--disable-mcp | bool | False | Disable all MCP endpoints (/mcp and /mcp-sse). |
models| Argument | Short | Type | Default | Description |
|---|---|---|---|---|
| (None) | Lists available image generation models and local cache status (cached flag, cache path, cache size). | |||
list | Explicit alias for list behavior (zimg models list). | |||
clear <precision> | str | Required | Clear local cached files for one precision (full, q8, q4). |
info| Argument | Type | Default | Description |
|---|---|---|---|
--json | bool | False | Output application diagnostics as JSON (for scripts/tools). |
| (none) | Shows version, runtime details, resolved data/config/output paths, env overrides, and hardware probe info. |
mcp| Argument | Type | Default | Description |
|---|---|---|---|
| (none) | Stdio-only MCP server (for agents). Use zimg-mcp or zimg mcp. |
By default, Z-Image Studio uses the following directories:
~/.local/share/z-image-studio (Linux), ~/Library/Application Support/z-image-studio (macOS), or %LOCALAPPDATA%\z-image-studio (Windows).<Data Directory>/outputs by default.~/.z-image-studio/config.json (created on first run after migration).
Z_IMAGE_STUDIO_DATA_DIR.Z_IMAGE_STUDIO_OUTPUT_DIR.Directory structure inside Data Directory by default:
zimage.db: SQLite databaseloras/: LoRA modelsoutputs/: Generated image filesOn first run without an existing config file, the app migrates legacy data by moving:
outputs/, loras/, and zimage.db from the current working directory (old layout) into the new locations.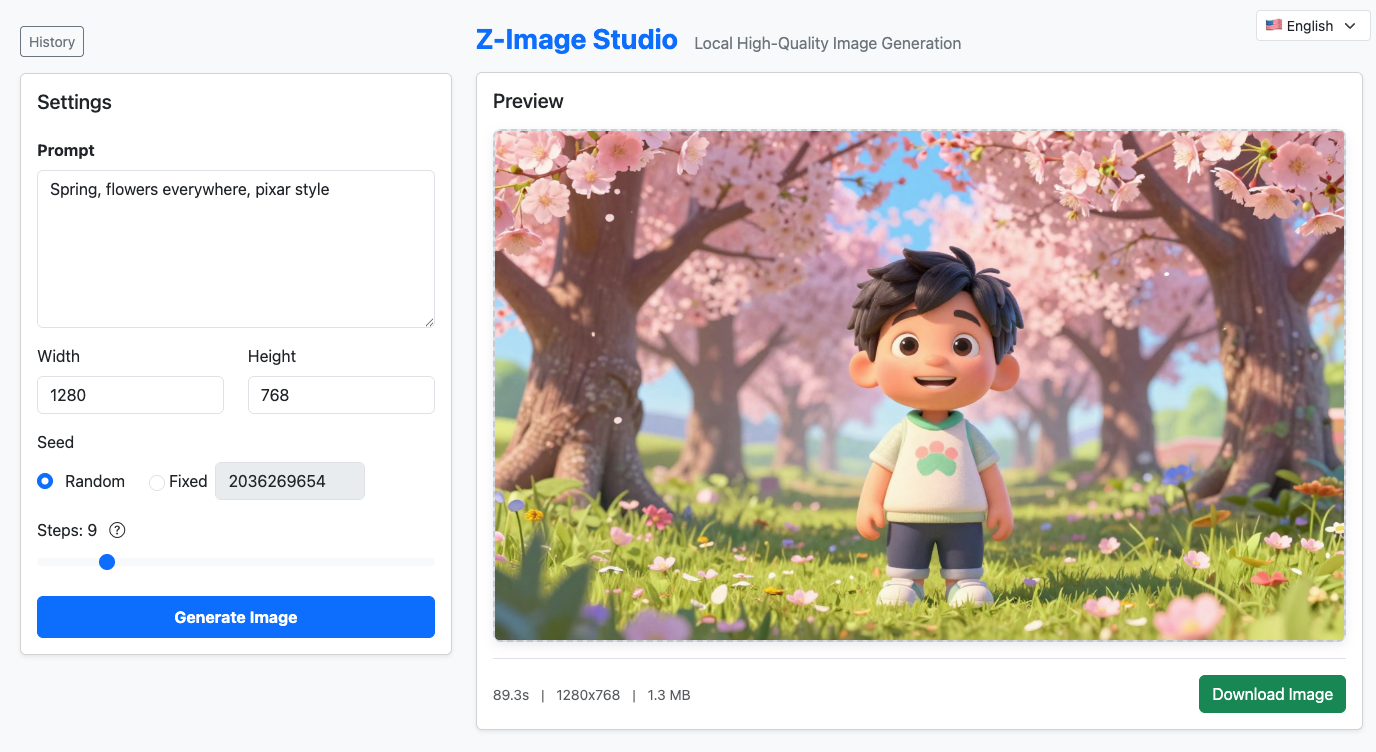 (Screenshot 1: Two column layout with History browser collapsed)
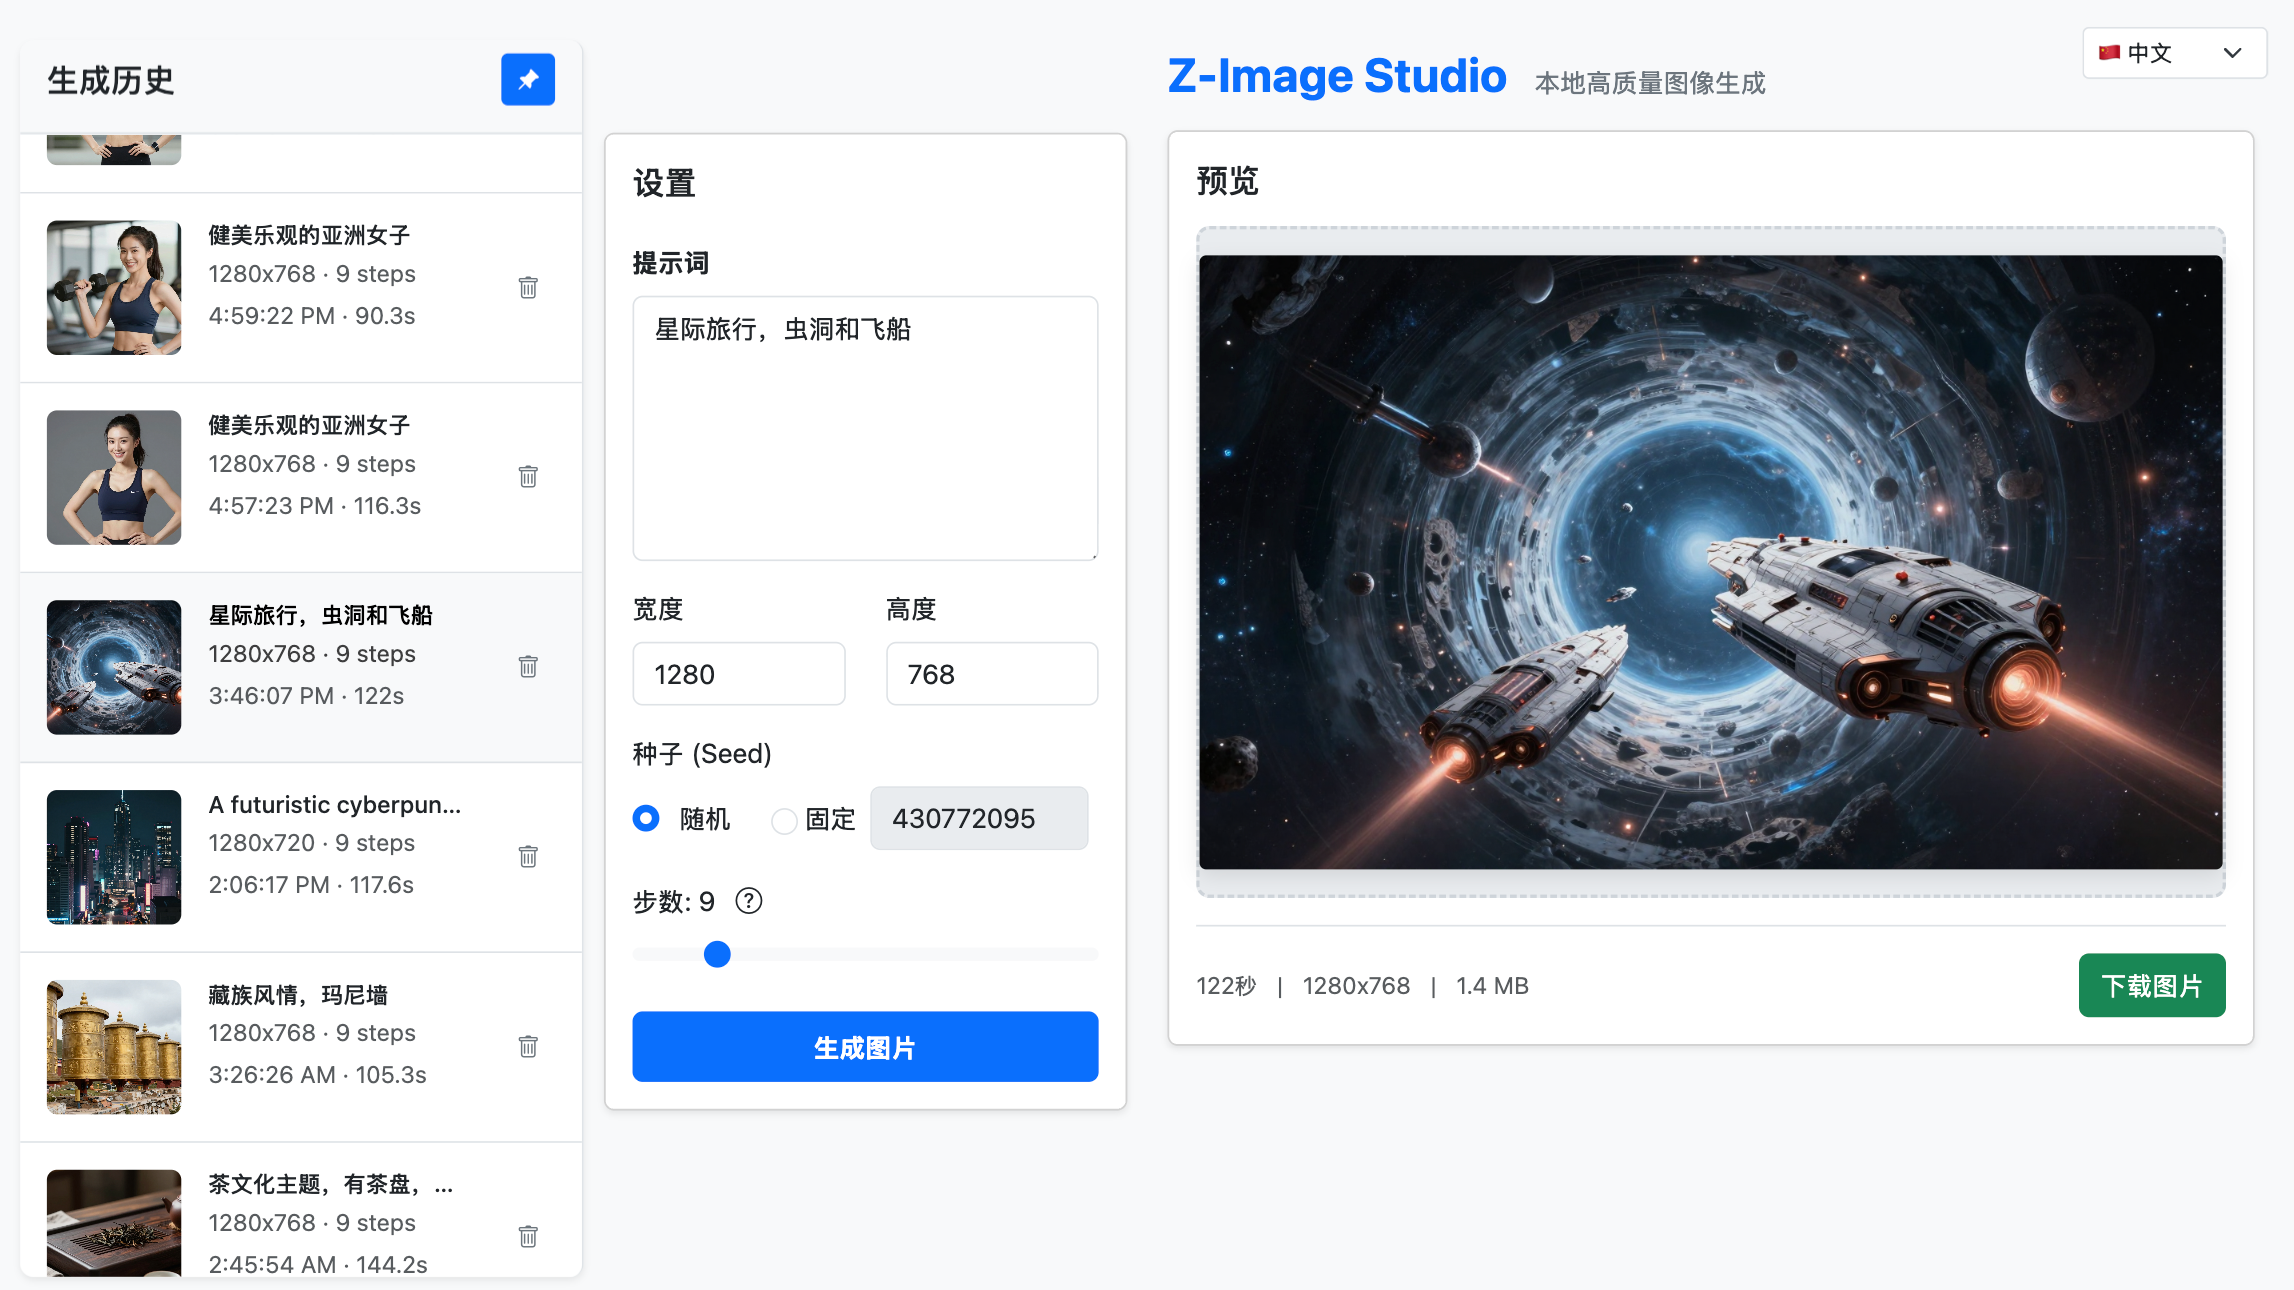 (Screenshot 2: Three column layout with History browser pinned)
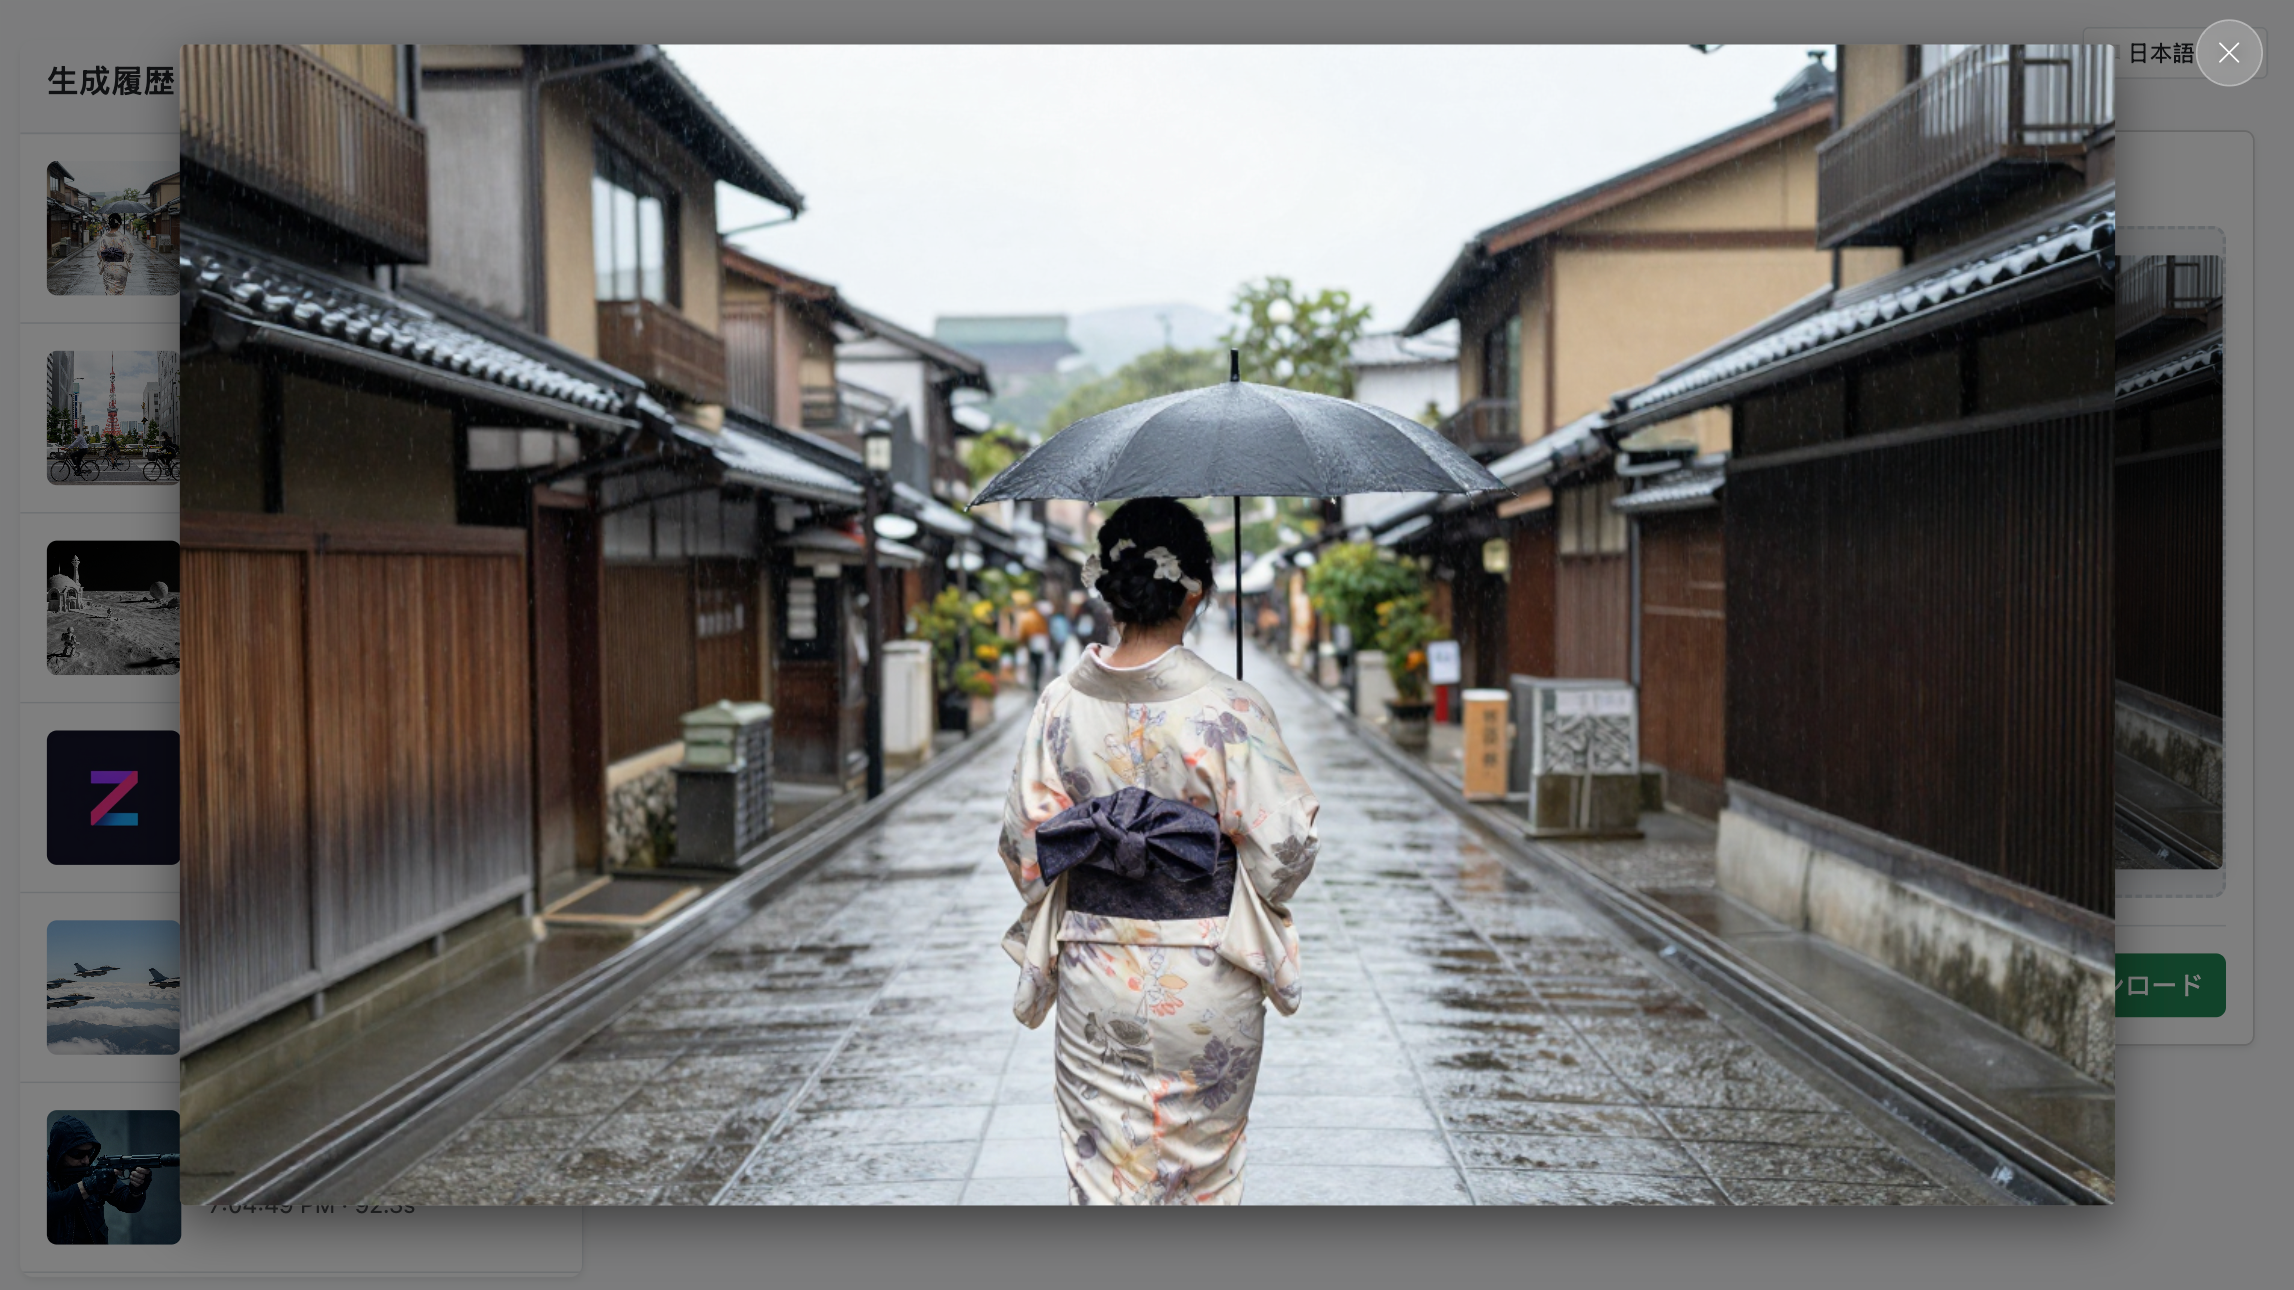 (Screenshot 3: Generated Image zoomed to fit the screen)
git clone https://github.com/iconben/z-image-studio.git
cd z-image-studio
Run CLI:
uv run src/zimage/cli.py generate "A prompt"
Run Server:
uv run src/zimage/cli.py serve --reload
Run tests:
uv run pytest
First install it:
```bash
uv pip install -e .
```

After this, the `zimg` command is available **inside this virtual environment**:

Then use the zimg command in either ways:

Using `uv` (recommended):
```bash
uv run zimg generate "A prompt"
```

or use in more traditional way:
```bash
source .venv/bin/activate  # Under Windows: .venv\Scripts\activate
zimg serve
```
 If you do not want your development data mess up your production data,
 You can define environment variable Z_IMAGE_STUDIO_DATA_DIR to change the data folder for
 You can also define environment variable Z_IMAGE_STUDIO_OUTPUT_DIR to change the output folder to another separate folder
Build and run with Docker:
# Build the image
docker build -t z-image-studio:dev .

# Run with source mounted for hot-reload
docker run -d \
  --name zimg-dev \
  -p 8000:8000 \
  -v $(pwd)/src:/app/src \
  -v z
Sign in to join the discussion.
No comments yet. Be the first to say what this is good for.
🪨 why use many token when few token do trick — Claude Code skill that cuts 65% of tokens by talking like caveman

The best-benchmarked open-source AI memory system. And it's free.

Orca is the ADE for working with a fleet of parallel agents. Run any coding agent with your own subscription. Available on desktop, mobile and remote runtime.
A cross-platform desktop All-in-One assistant for Claude Code, Codex, OpenCode, OpenClaw, Grok Build & Hermes Agent. Only official website: ccswitch.io

Never stop coding. Free MIT AI gateway: one endpoint, 352 providers (150+ free), 1200+ models Kimi, Claude, GPT, Gemini, GLM, DeepSeek, MiniMax. Works with Claude Code, Codex, Cursor, OpenCode, Cline & Copilot. Quota-aware auto-fallback, RTK+Caveman compression saves 15-95% tokens, MCP/A2A, Desktop/PWA. Built by 550+ contributors

Compress tool outputs, logs, files, and RAG chunks before they reach the LLM. 20% fewer tokens for coding agents, 60-95% fewer tokens for JSON, same answers. Library, proxy, MCP server.